 Documentation
WBE2R-R-ZIGBEE v.1 legacy module
This page describes the discontinued WBE2R-R-ZIGBEE v.1; for the current model, see WBE2R-R-ZIGBEE v.2.
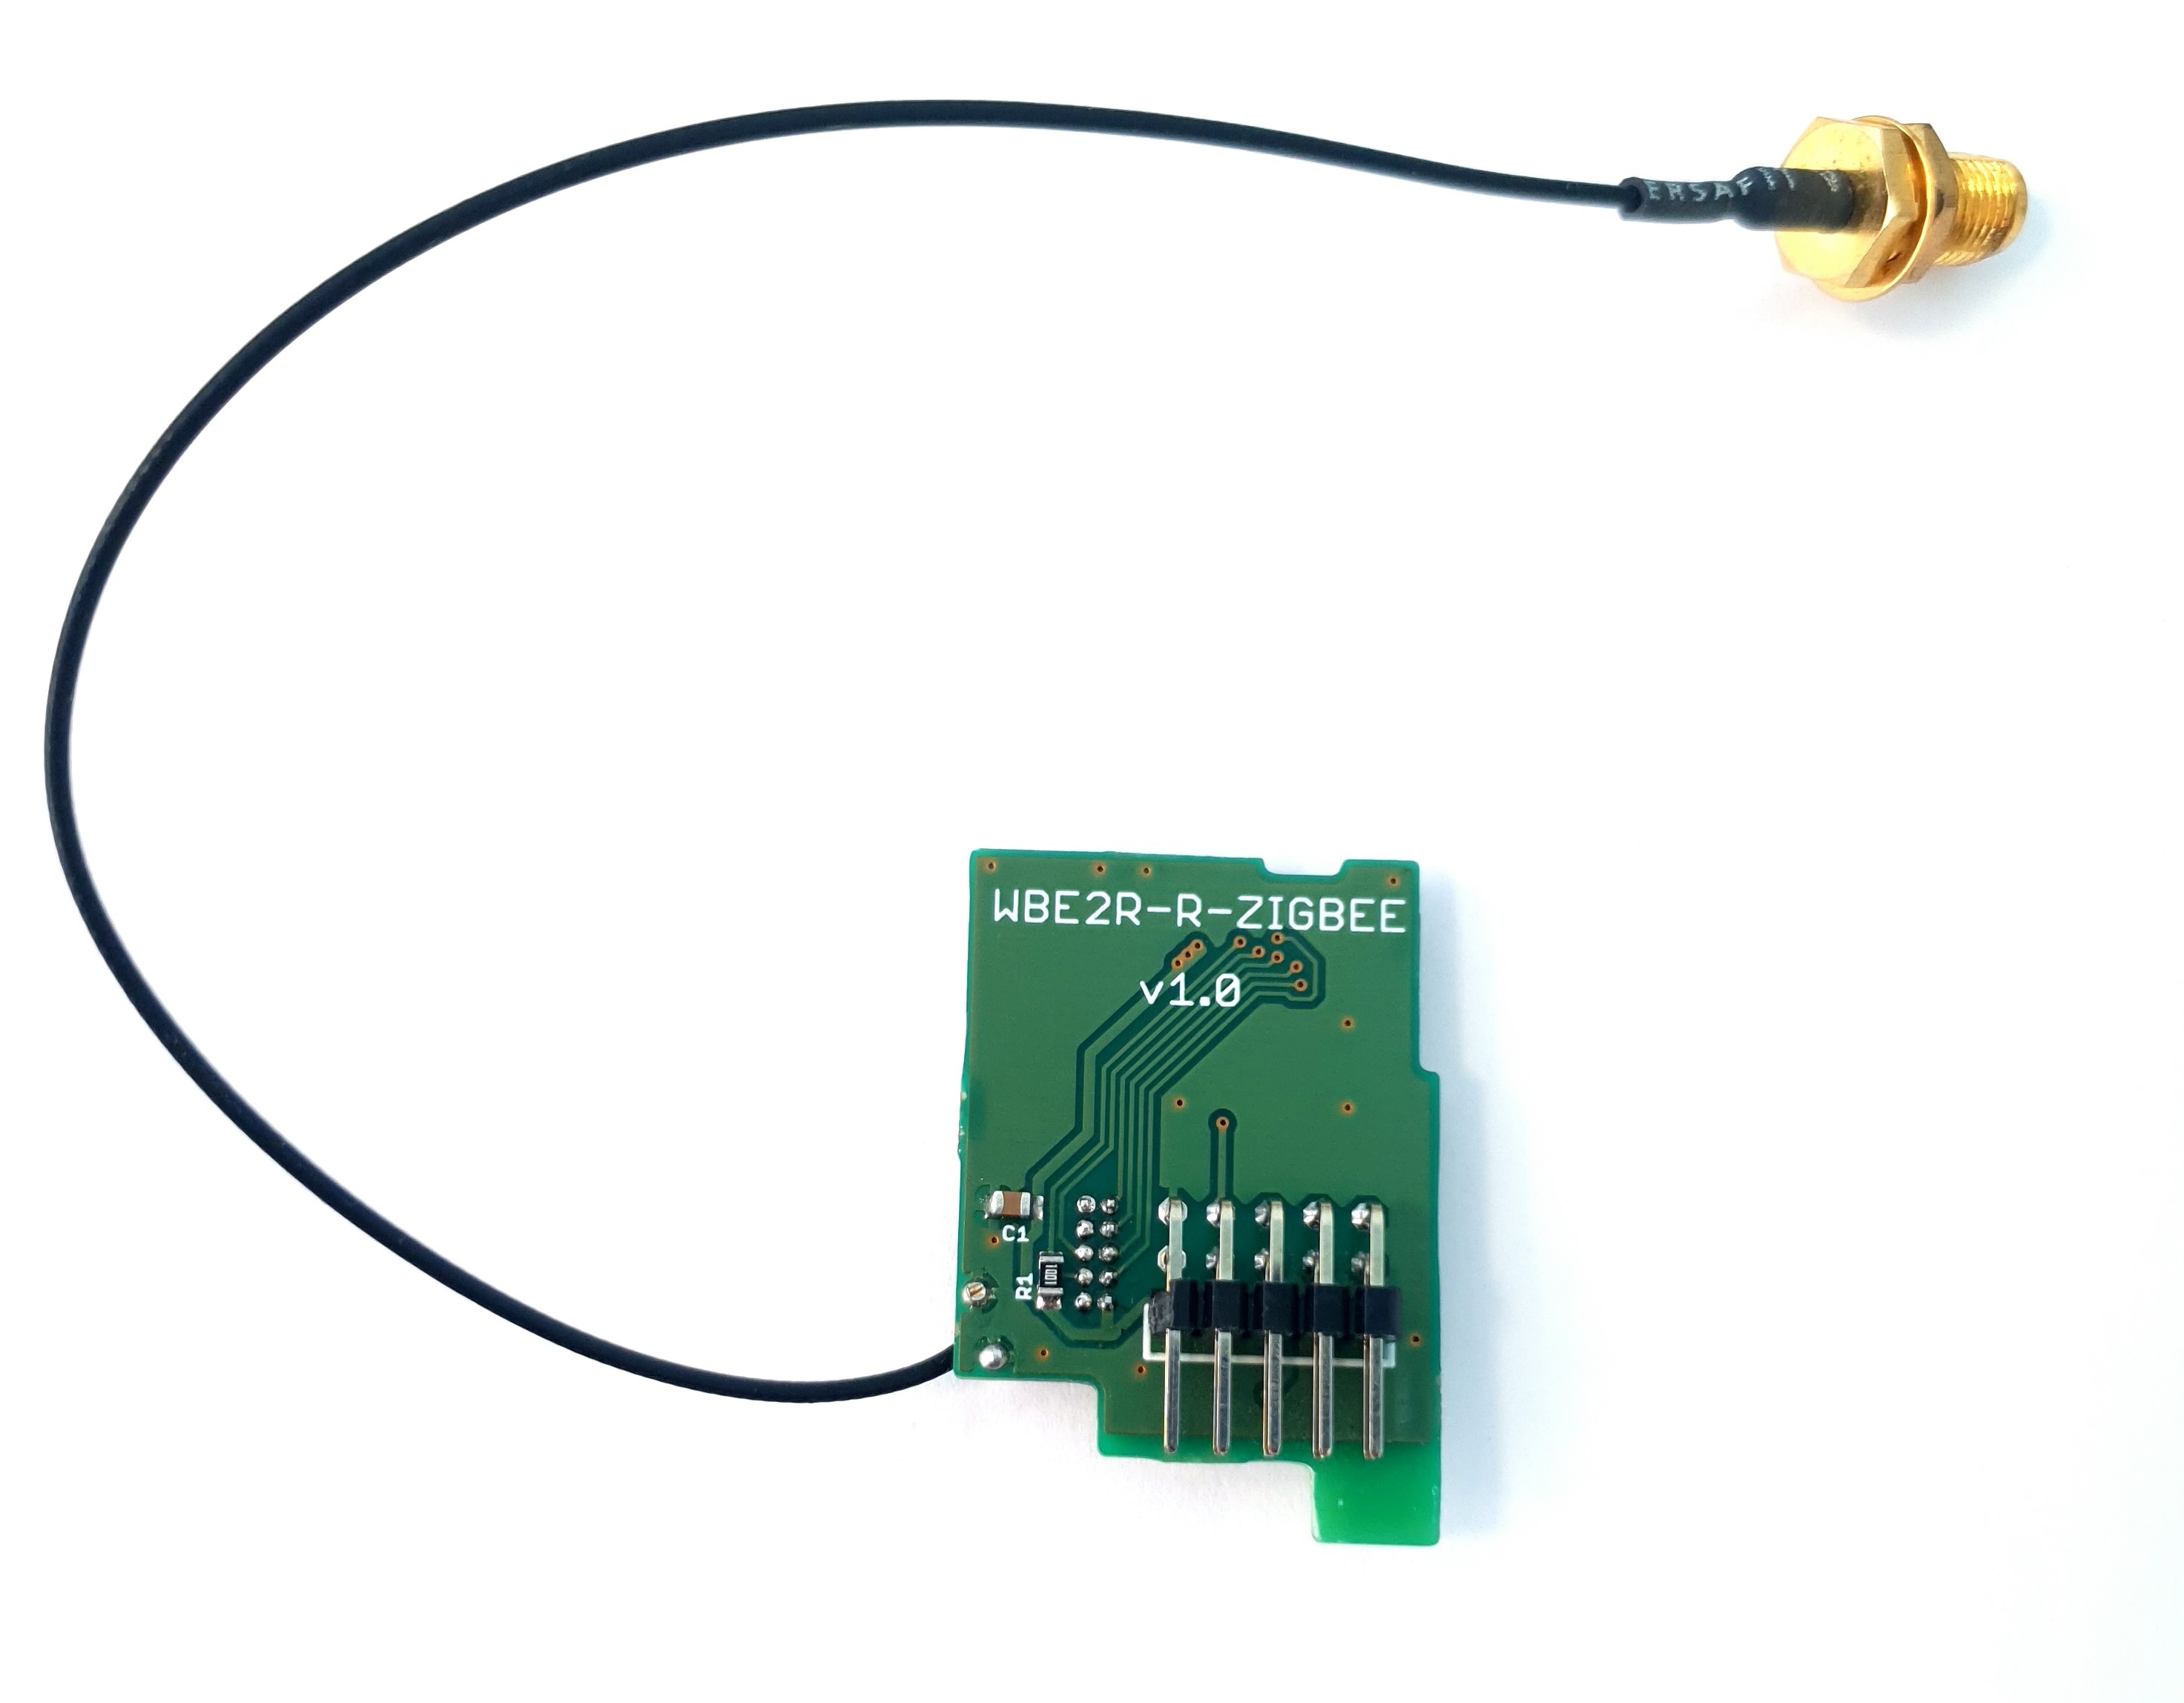
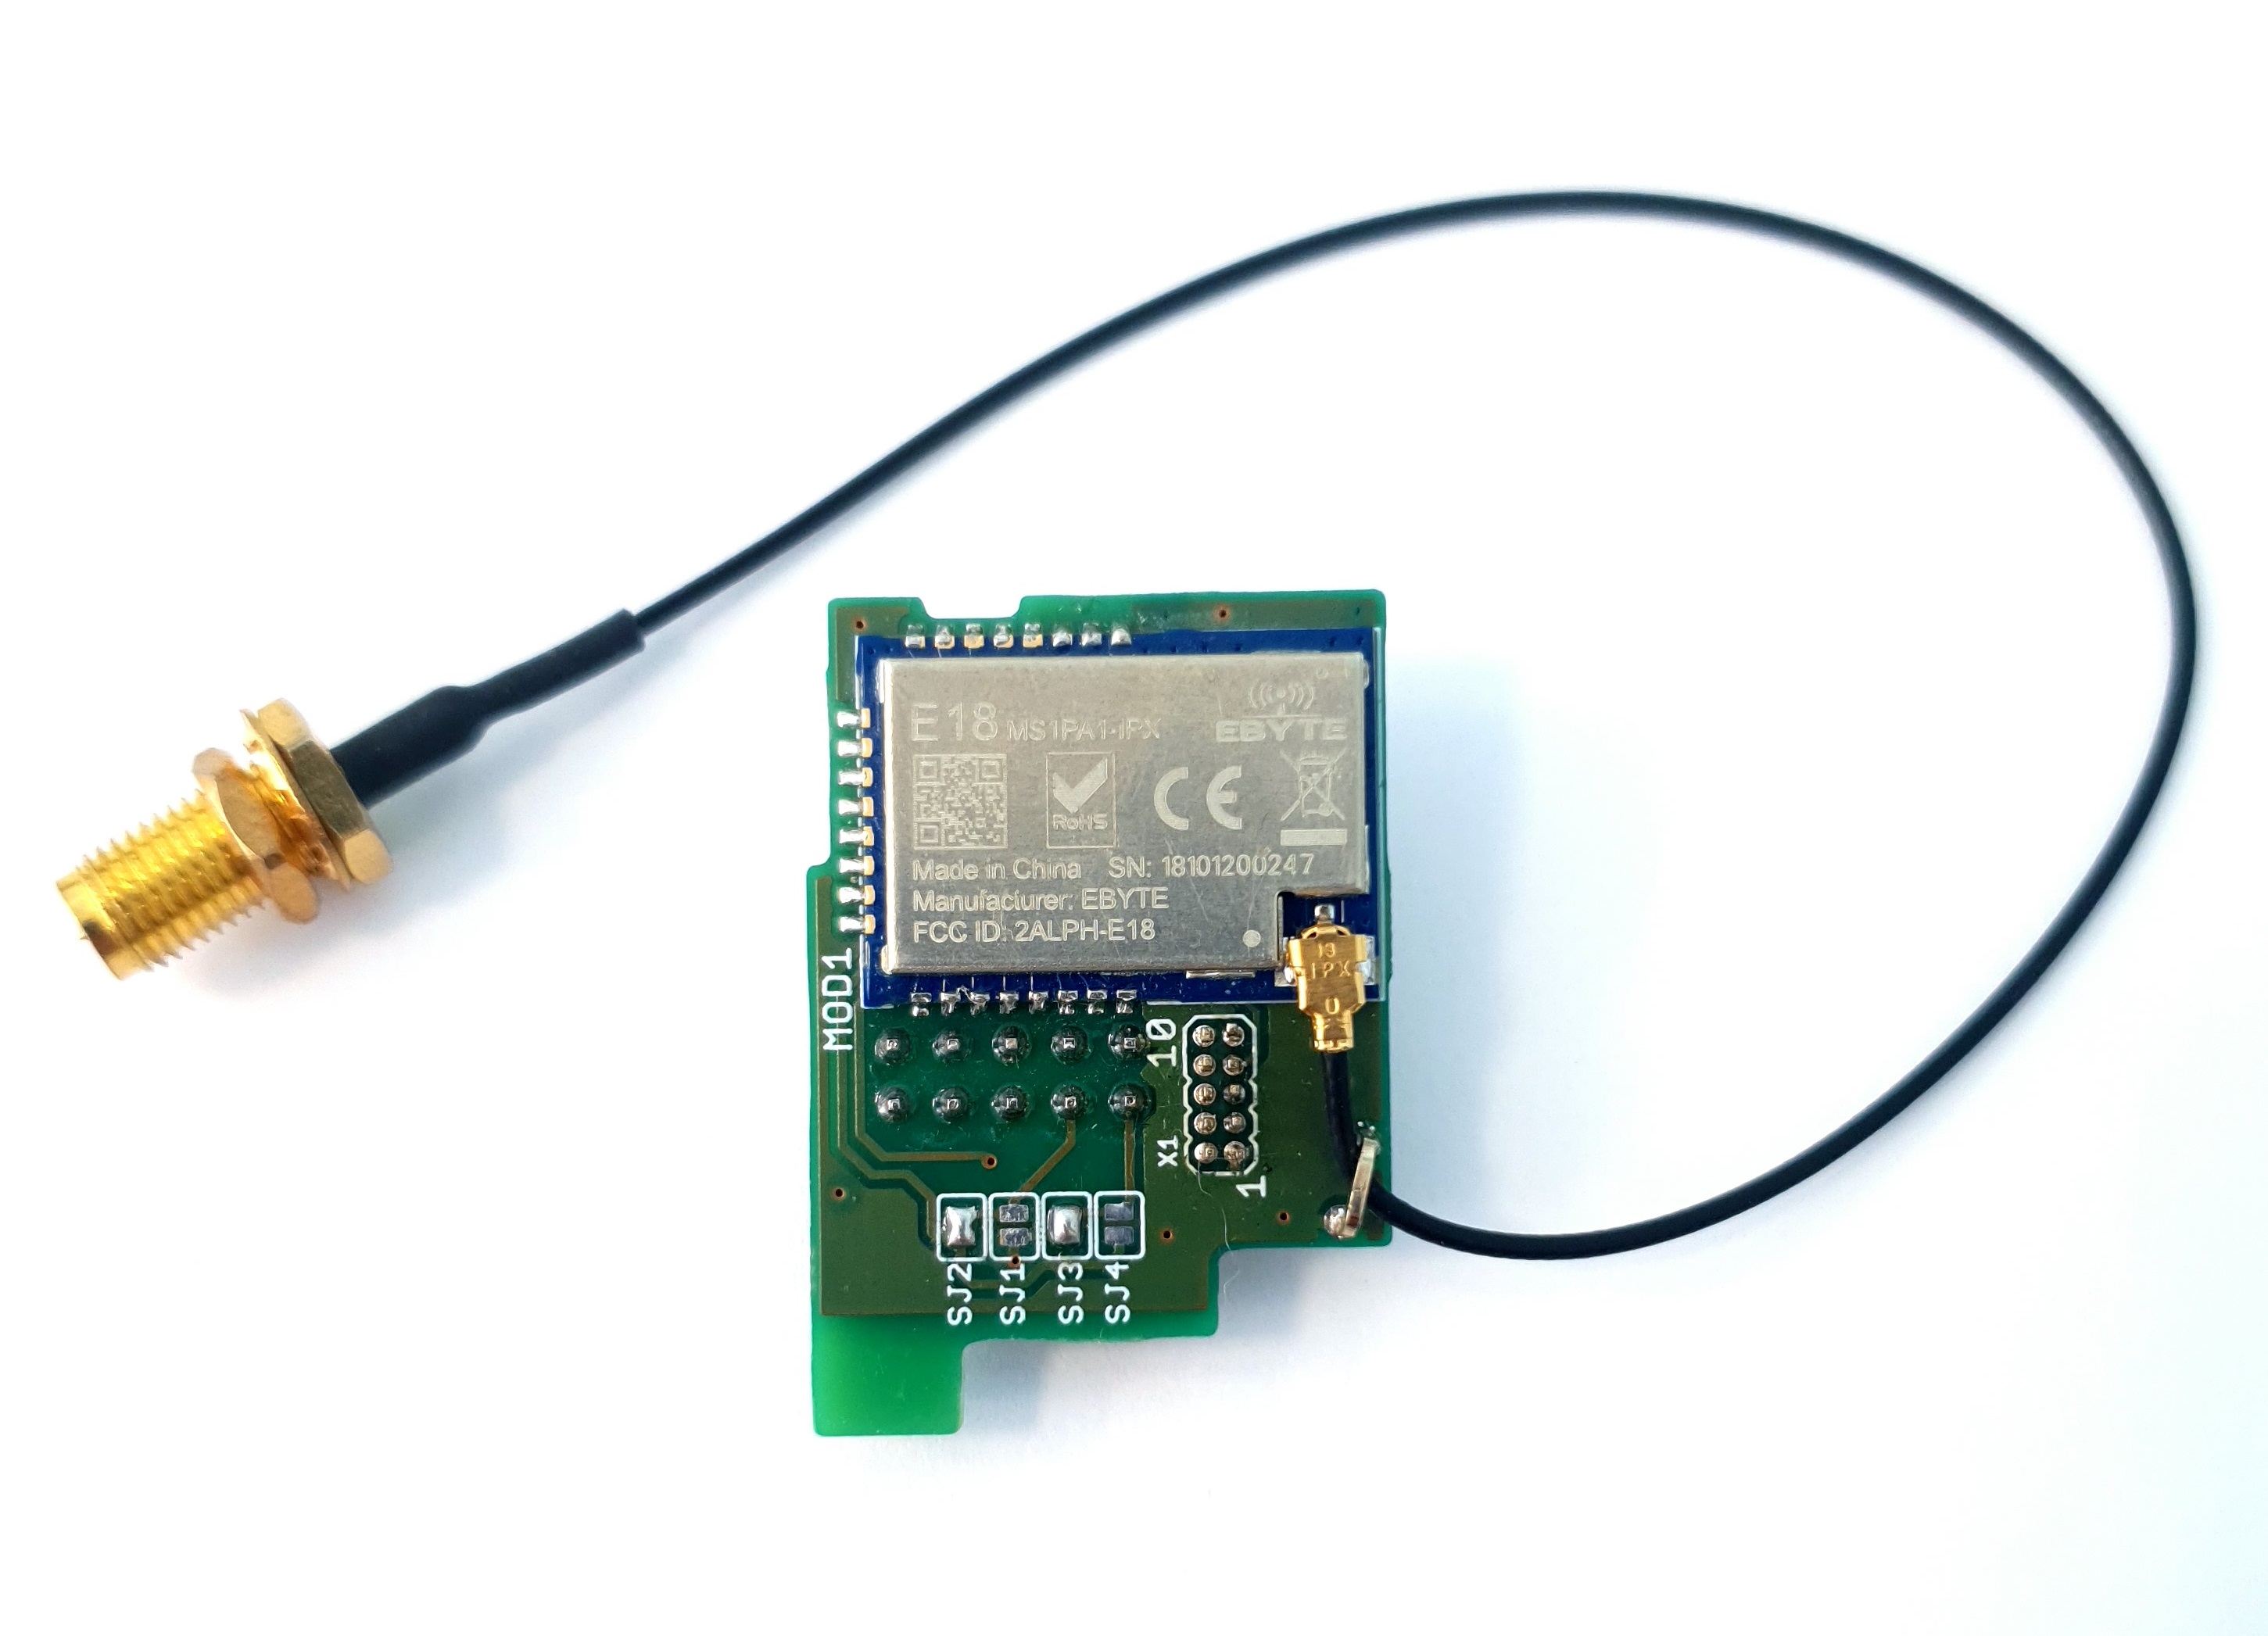
Module overview
WBE2R-R-ZIGBEE v.1 uses an Ebyte E18-MS1PA1-IPX module with a Texas Instruments CC2530+CC2592 chipset. It supports Z-Stack 1.2, up to 20 direct device connections and up to 30 through routers (information source).
Technical specifications
| Parameter | Value |
|---|---|
| Transmitter model | Ebyte E18-MS1PA1-IPX |
| Transmit power | 20dBm (100mW) |
| Power consumption, W | 0,5 |
The module has no built-in antenna. Connect an external antenna through the RP-SMA female connector.
When ordered with a Wiren Board controller, the external antenna connector is installed in the controller enclosure.
Installation
The module is compatible with all revisions of the Wiren Board 6 of all revisions. It can be installed as follows:
- Wiren Board 6.3–6.6 — up to 3 modules in slots MOD1–MOD3.
- Wiren Board 6.7 — up to 4 modules in slots MOD1–MOD4.
When modules are ordered with a Wiren Board controller, they are installed at the factory and configured in the web interface .
If you purchased the modules separately, install them as follows:
- Disassemble the controller enclosure.
- Insert the module with the correct orientation: its protrusion must fit the slot in the controller PCB.
-
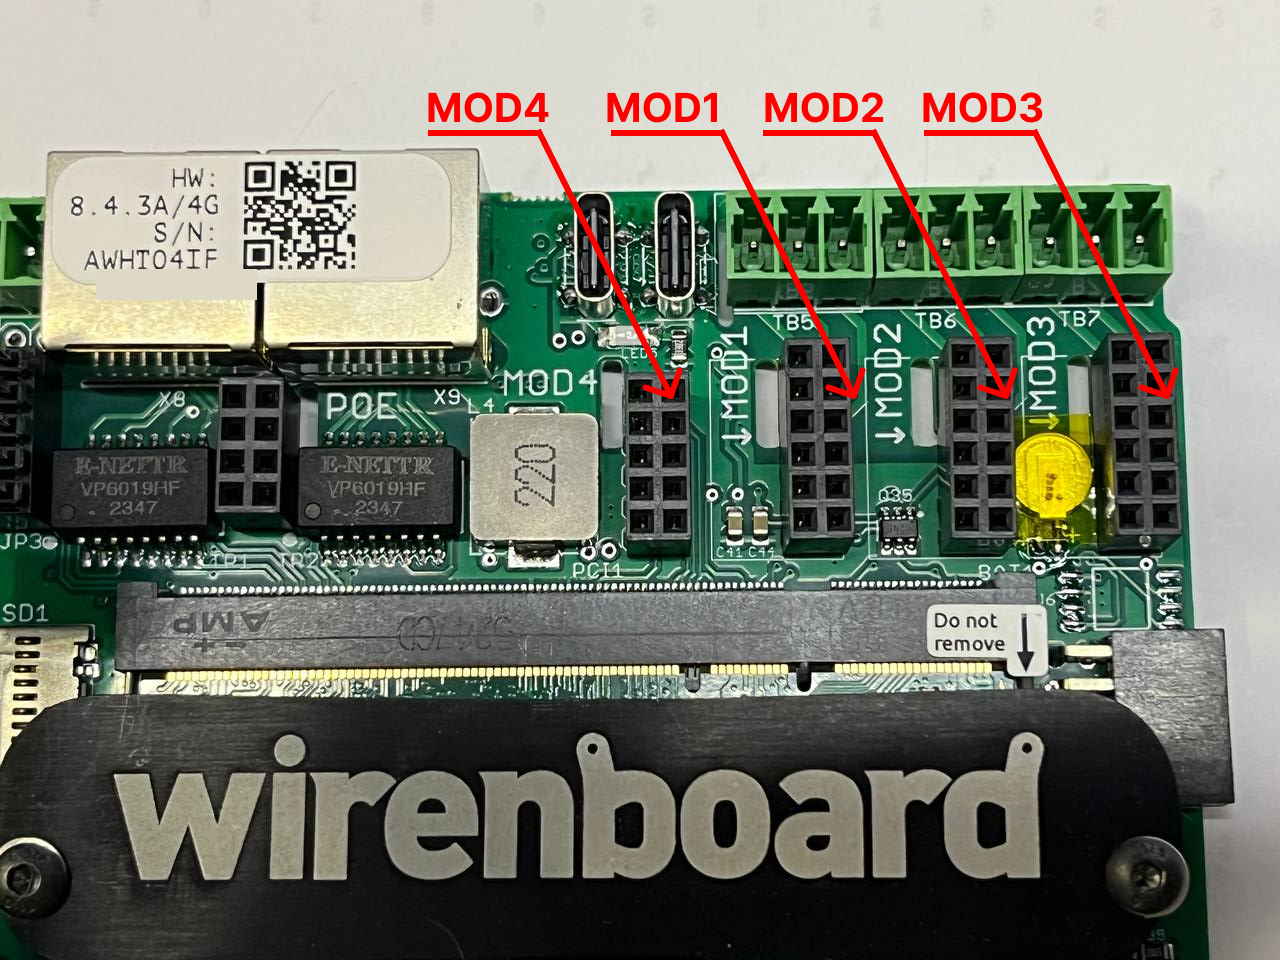 Expansion module port numbering (WB 6.7)
- Secure the SMA socket in the enclosure hole above the Ethernet connectors using its nuts. The socket and enclosure hole have a flat section that aligns the connector and prevents rotation. Enclosures earlier than Wiren Board 6.5 require drilling a 6.5 mm hole.
- Reassemble the enclosure. The cable between the module and SMA socket must not be pinched, sharply bent or trapped between the LED and the top-cover light guide.
- Screw the external antenna onto the SMA socket.
- For reliable radio communication in a metal cabinet, position the antenna outside it.
- Expansion module installation
-
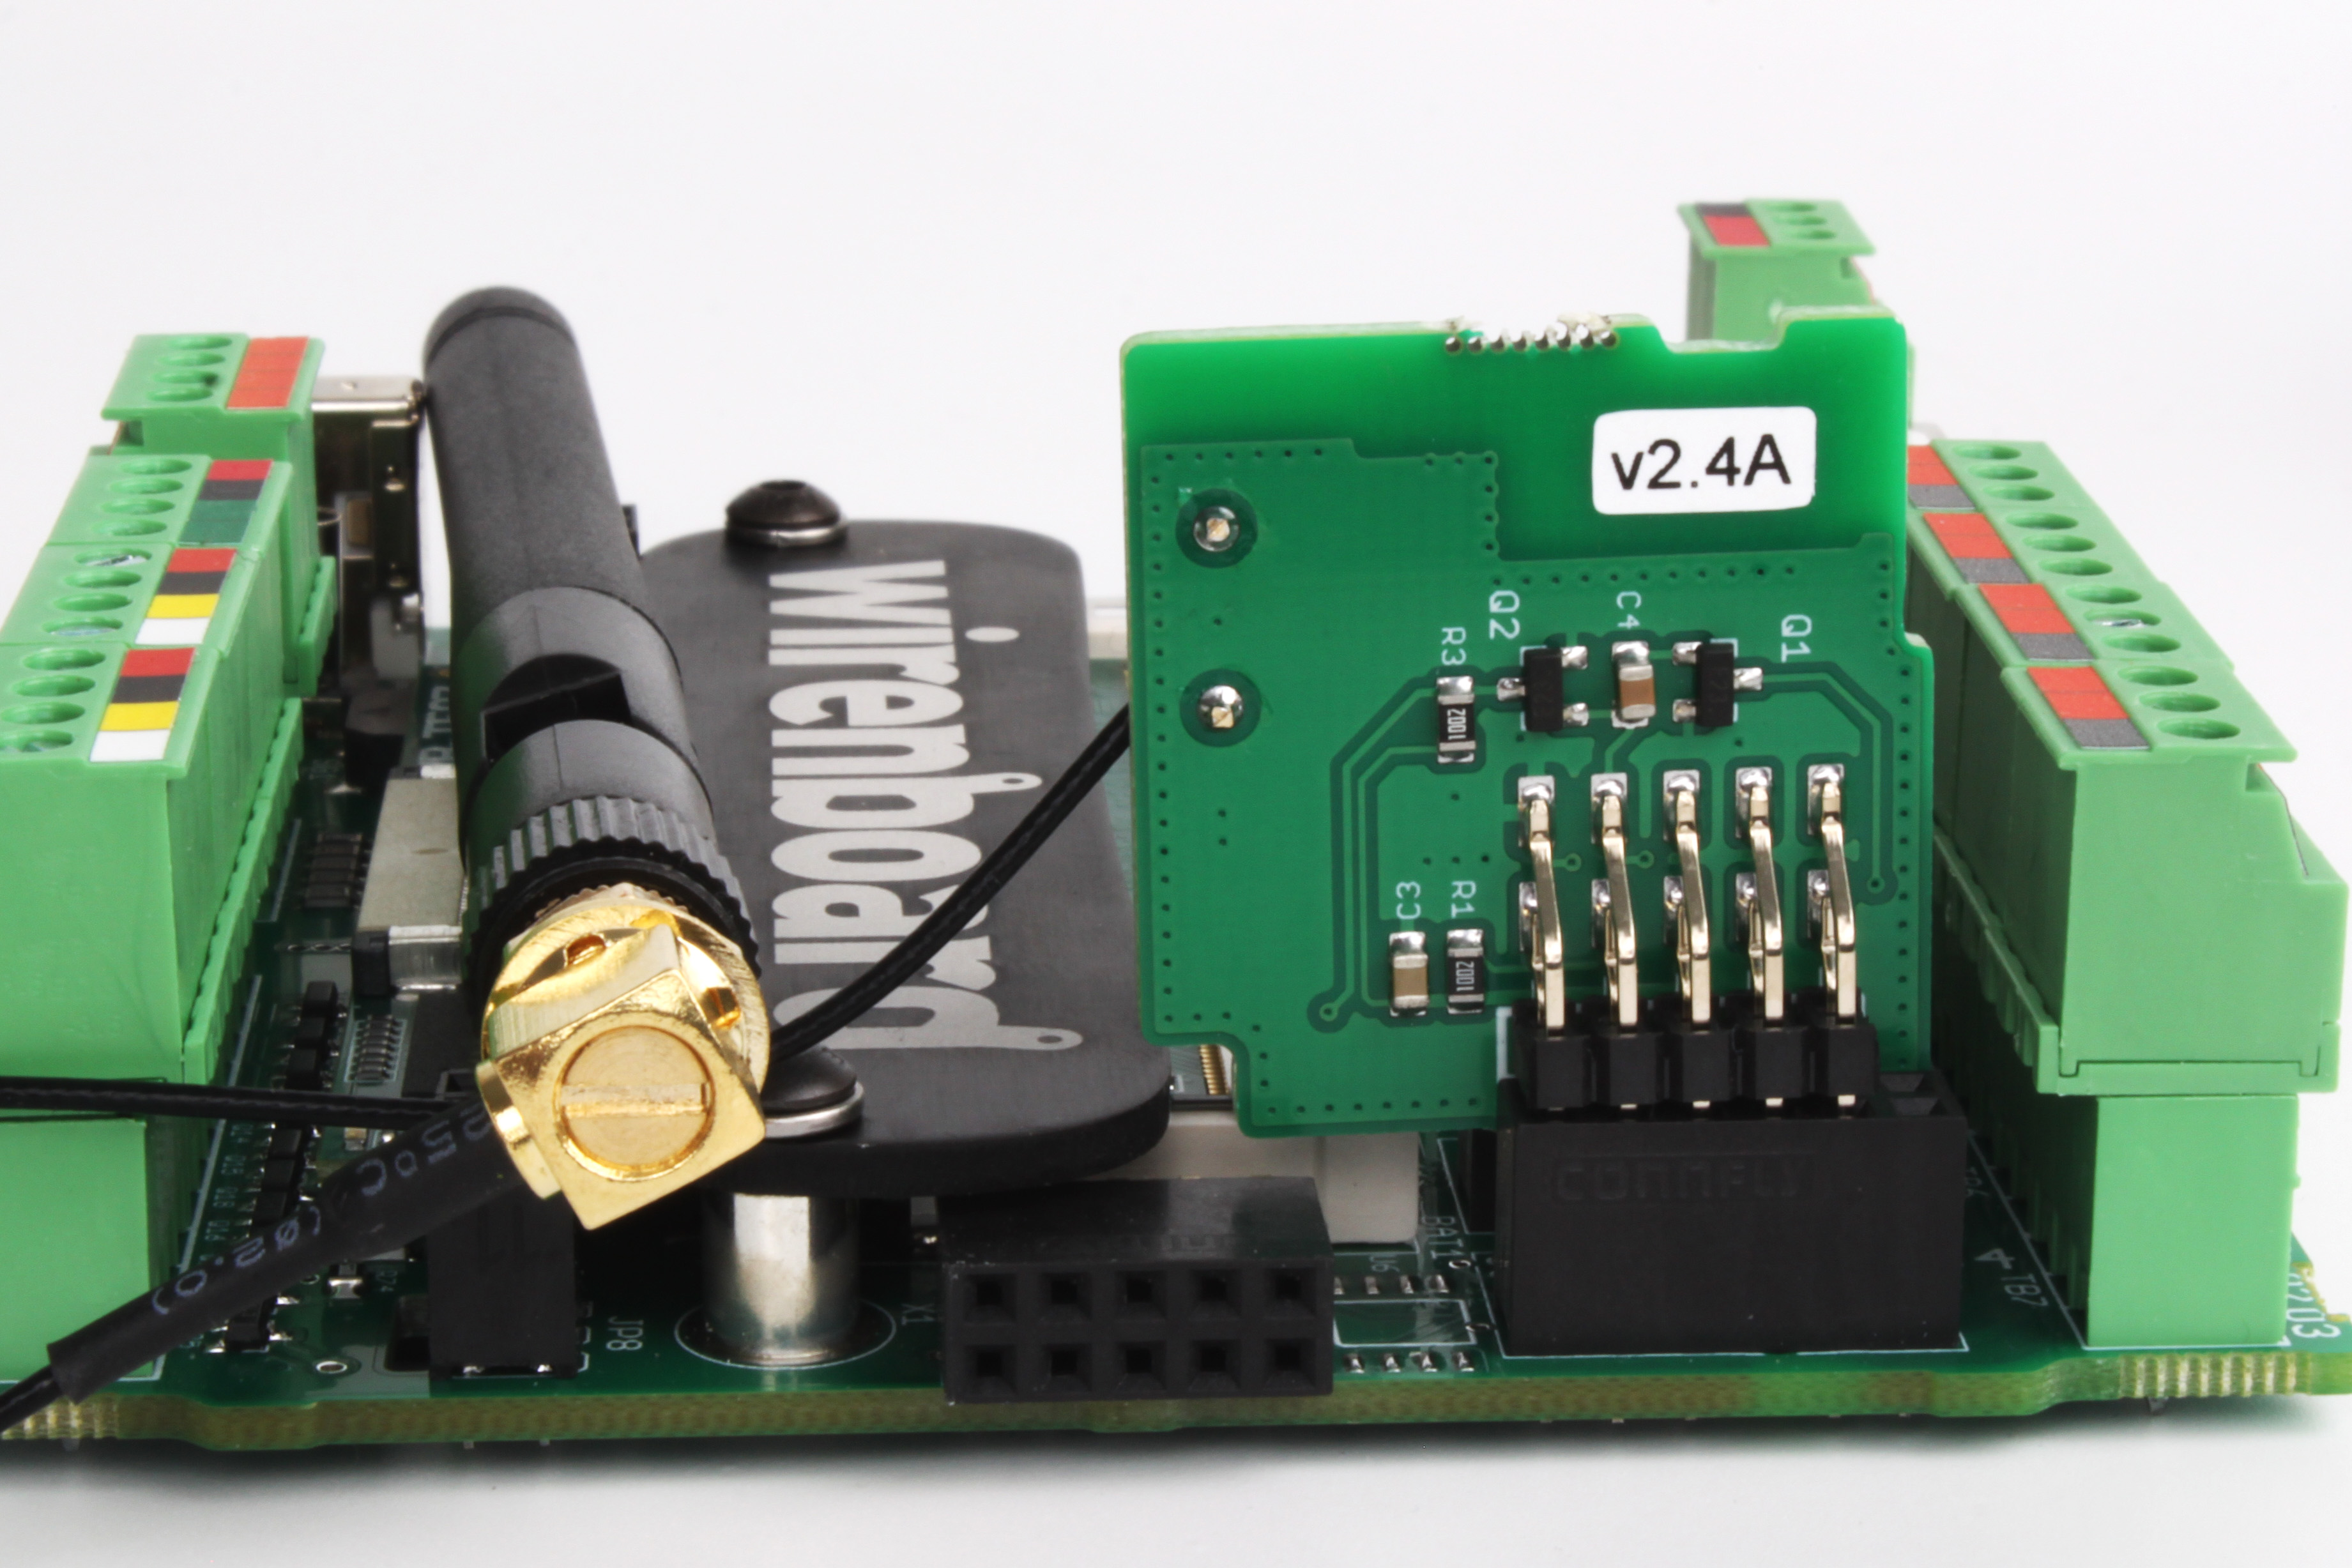 Inserting the module into its connector
-
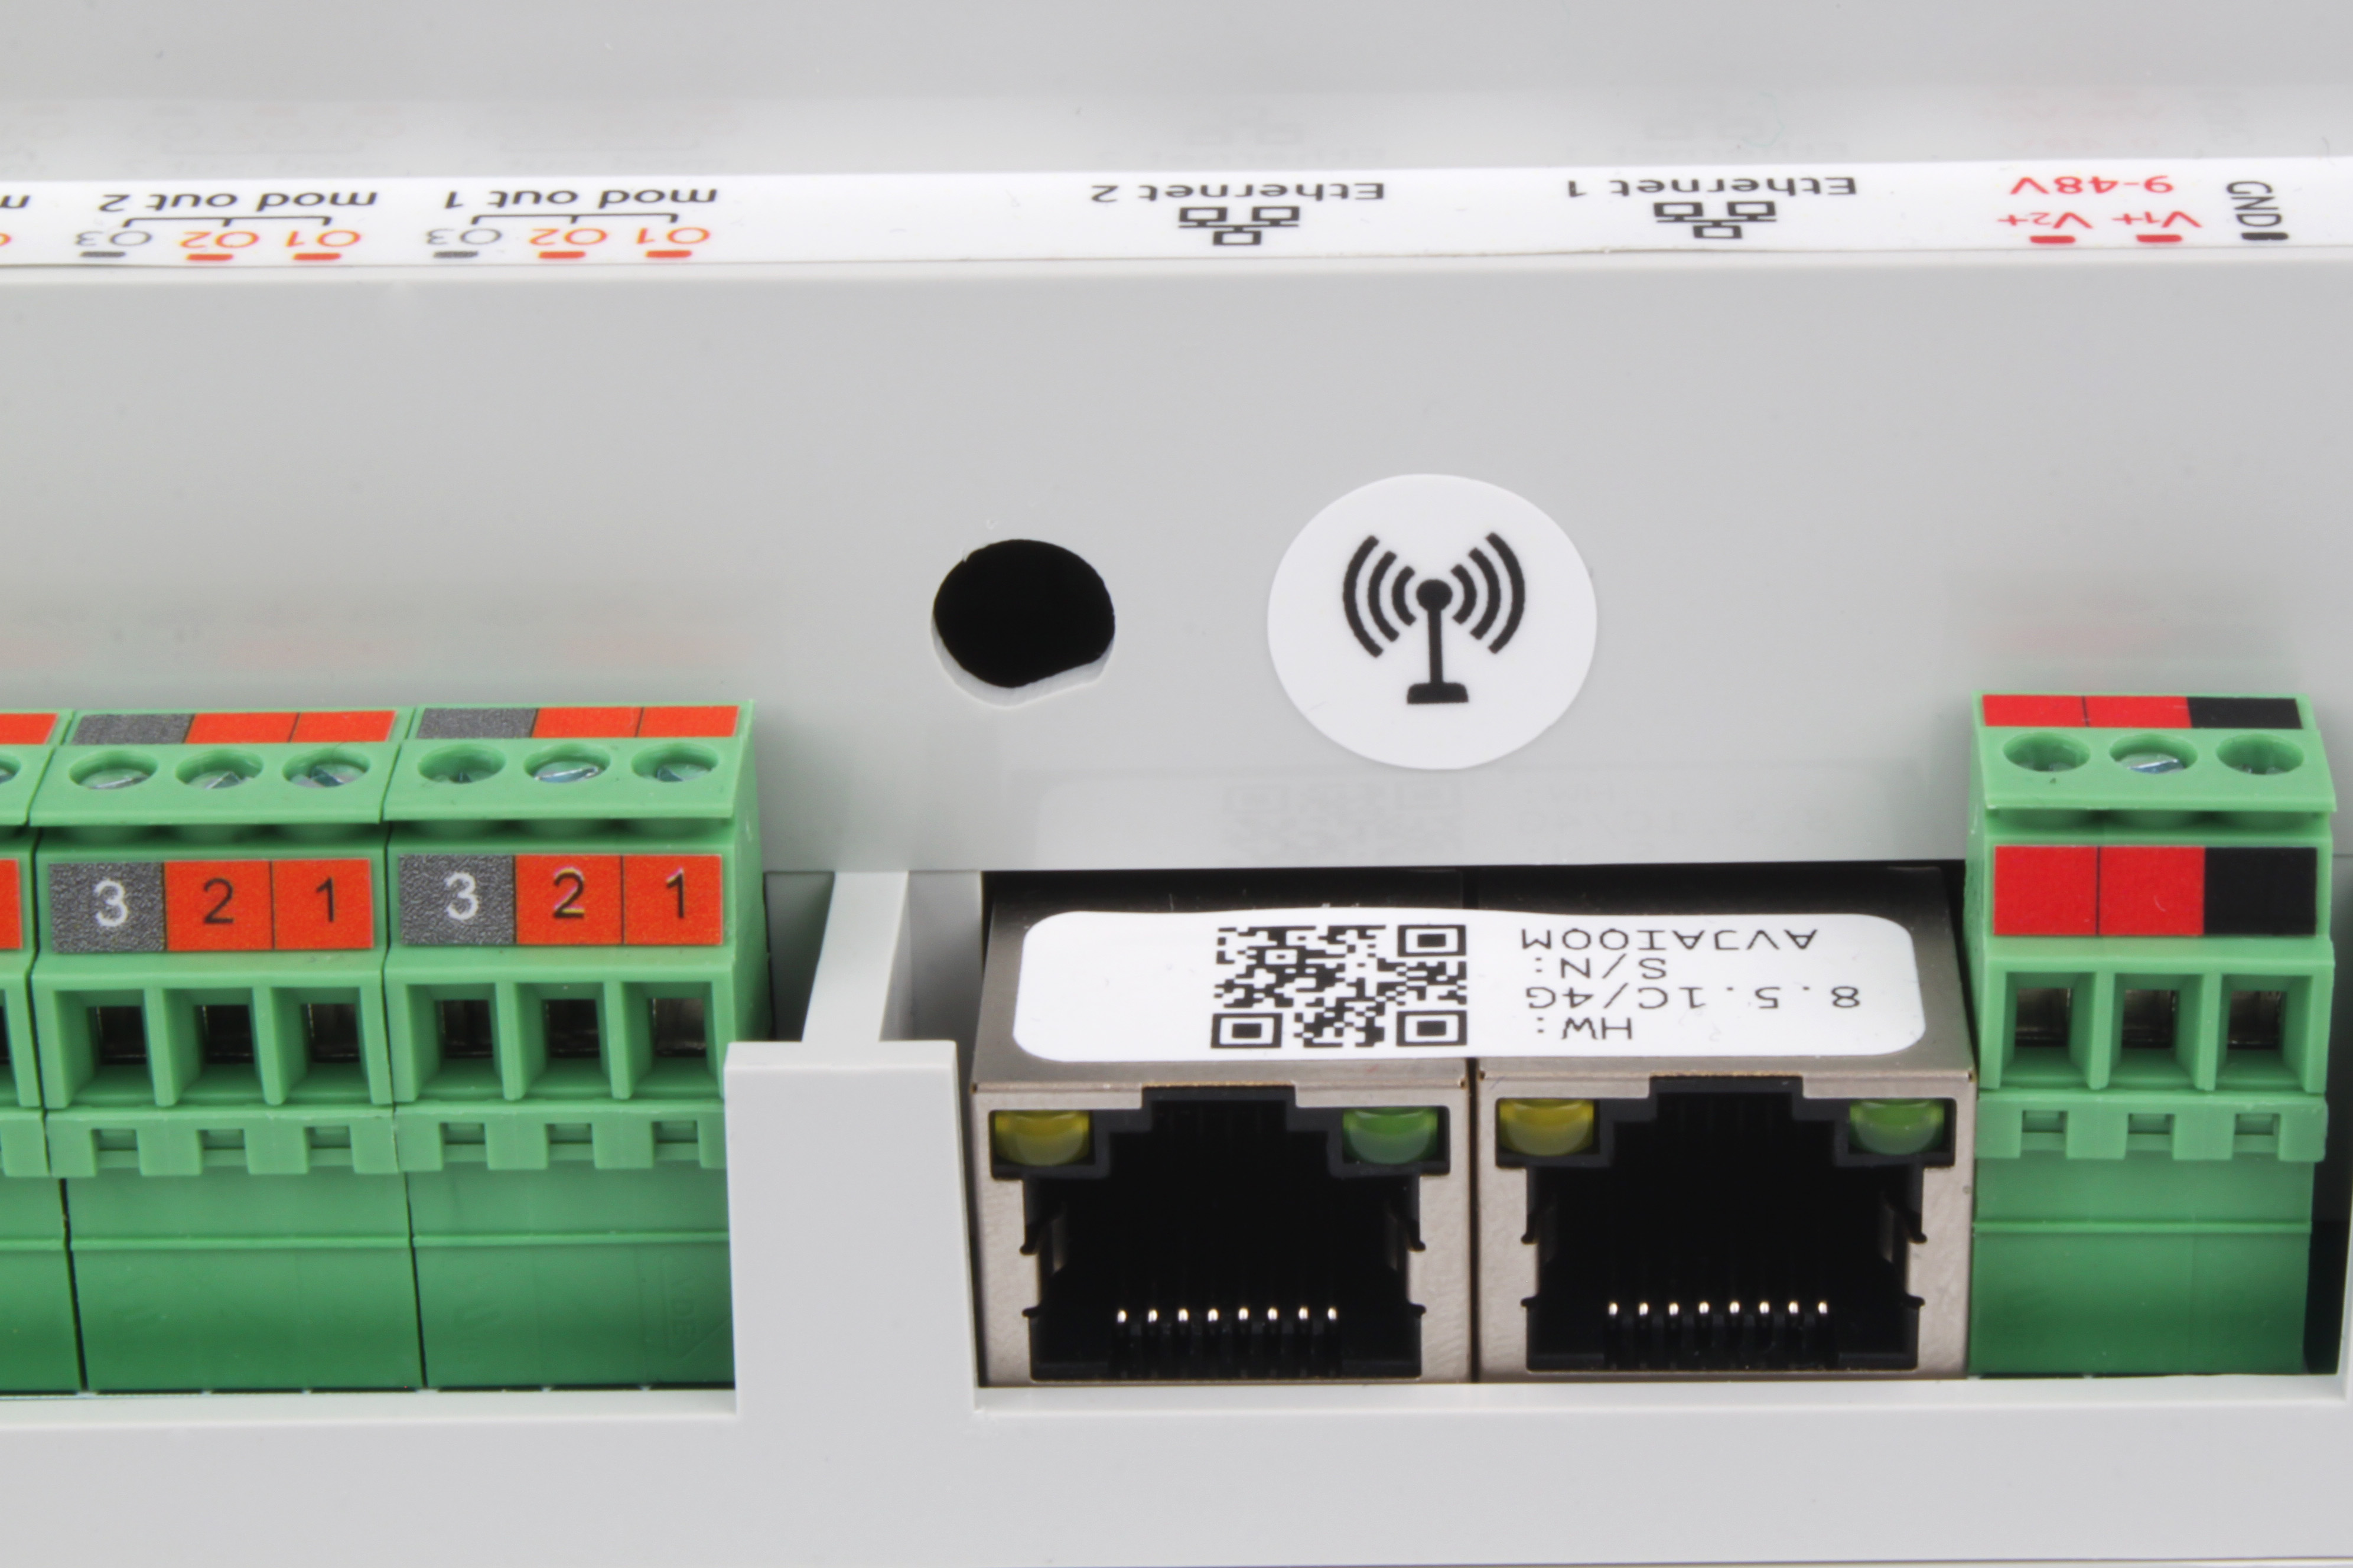 Hole for the SMA antenna socket
-
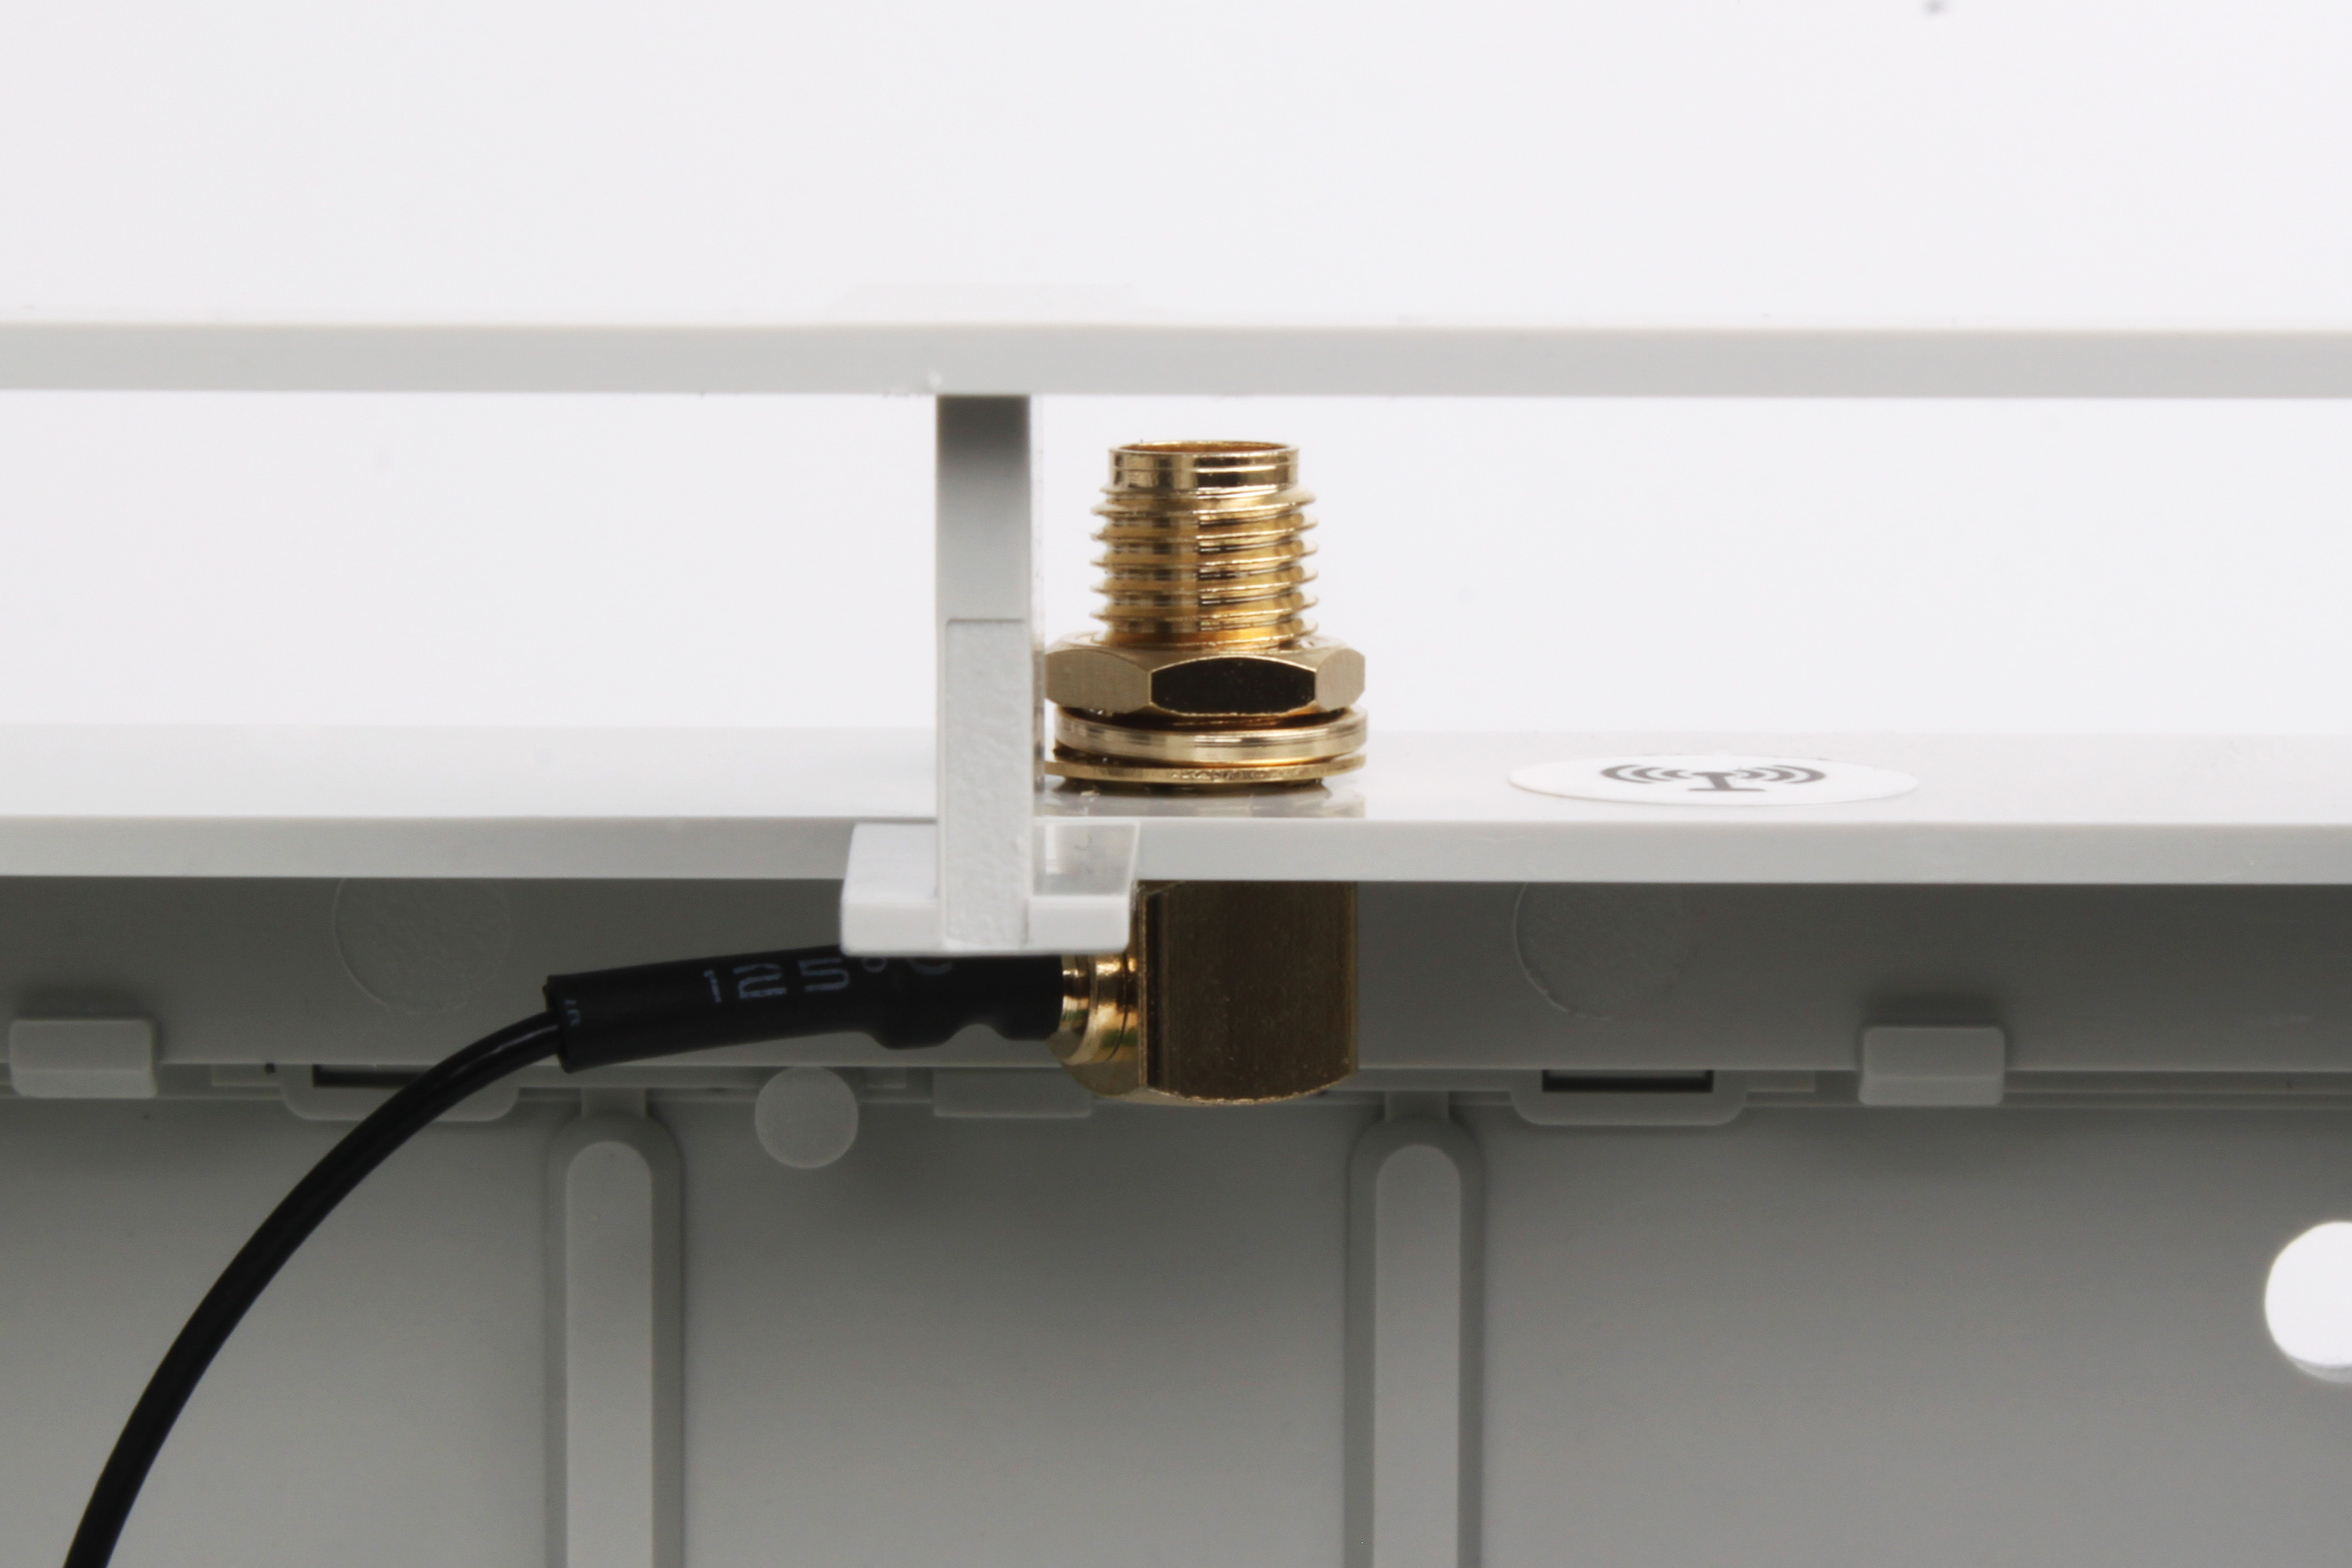 Installing the SMA antenna socket
-
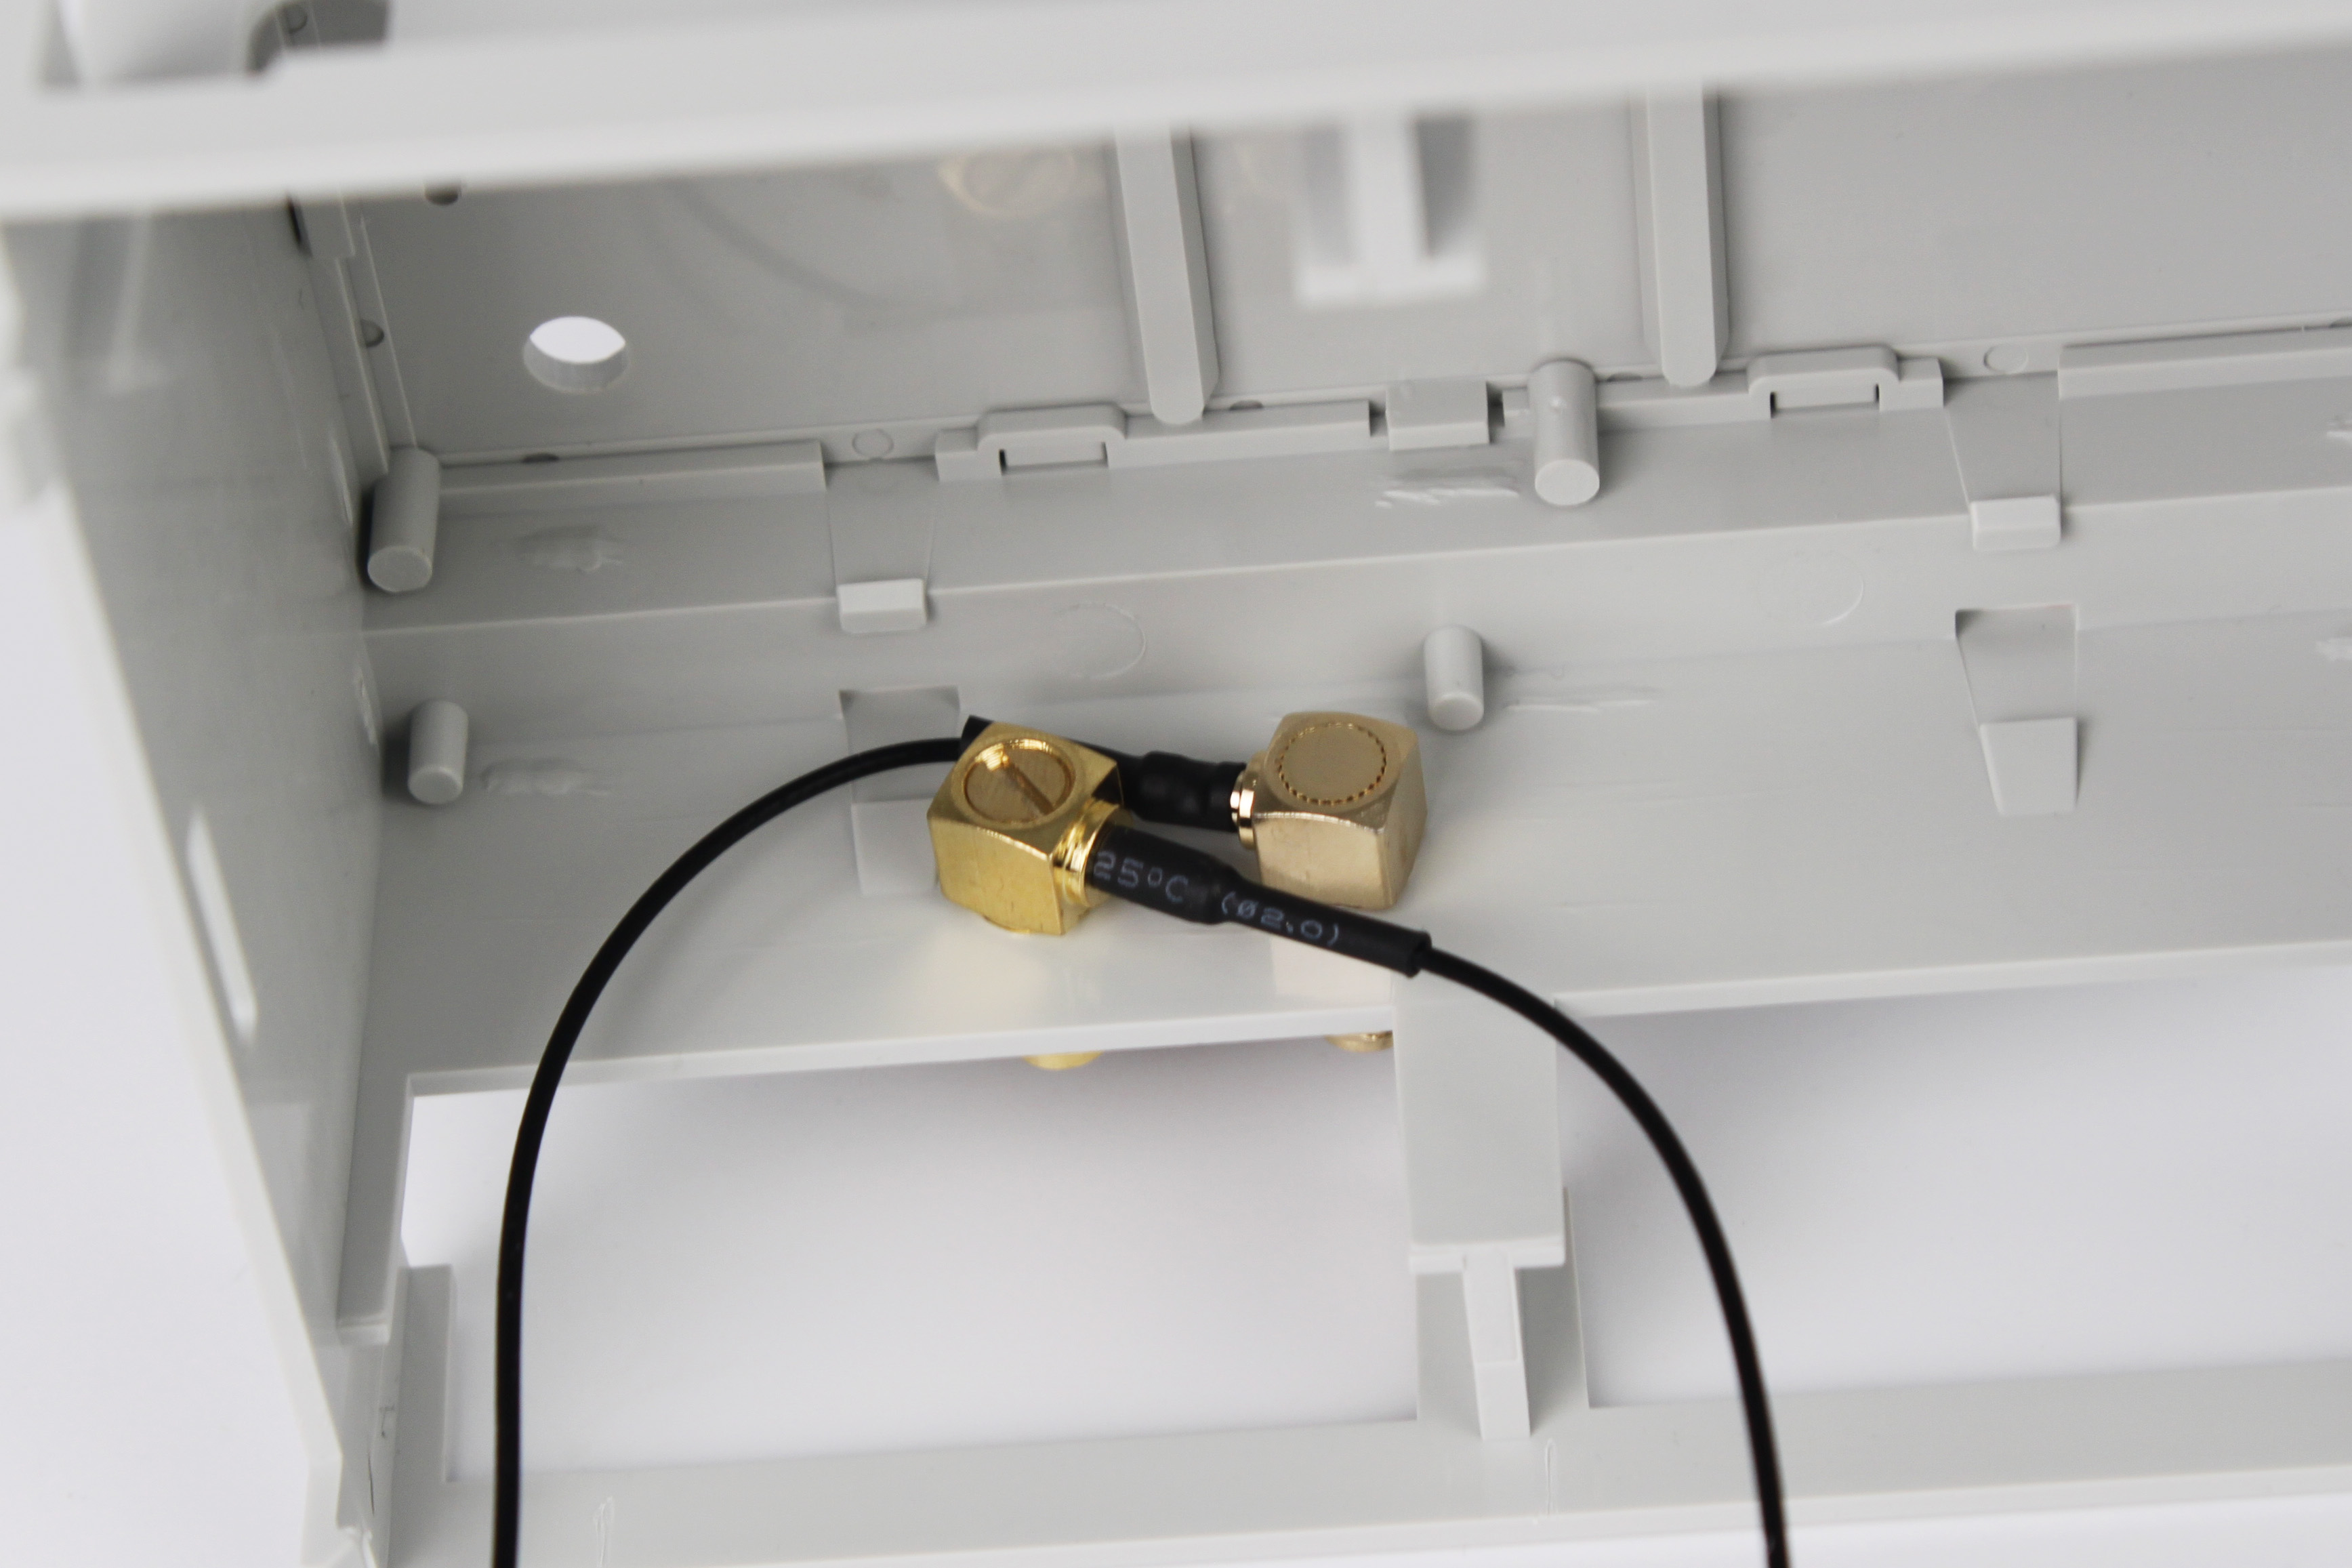 Two right-angle SMA connectors installed in opposite orientations
Configuration
Access permissions
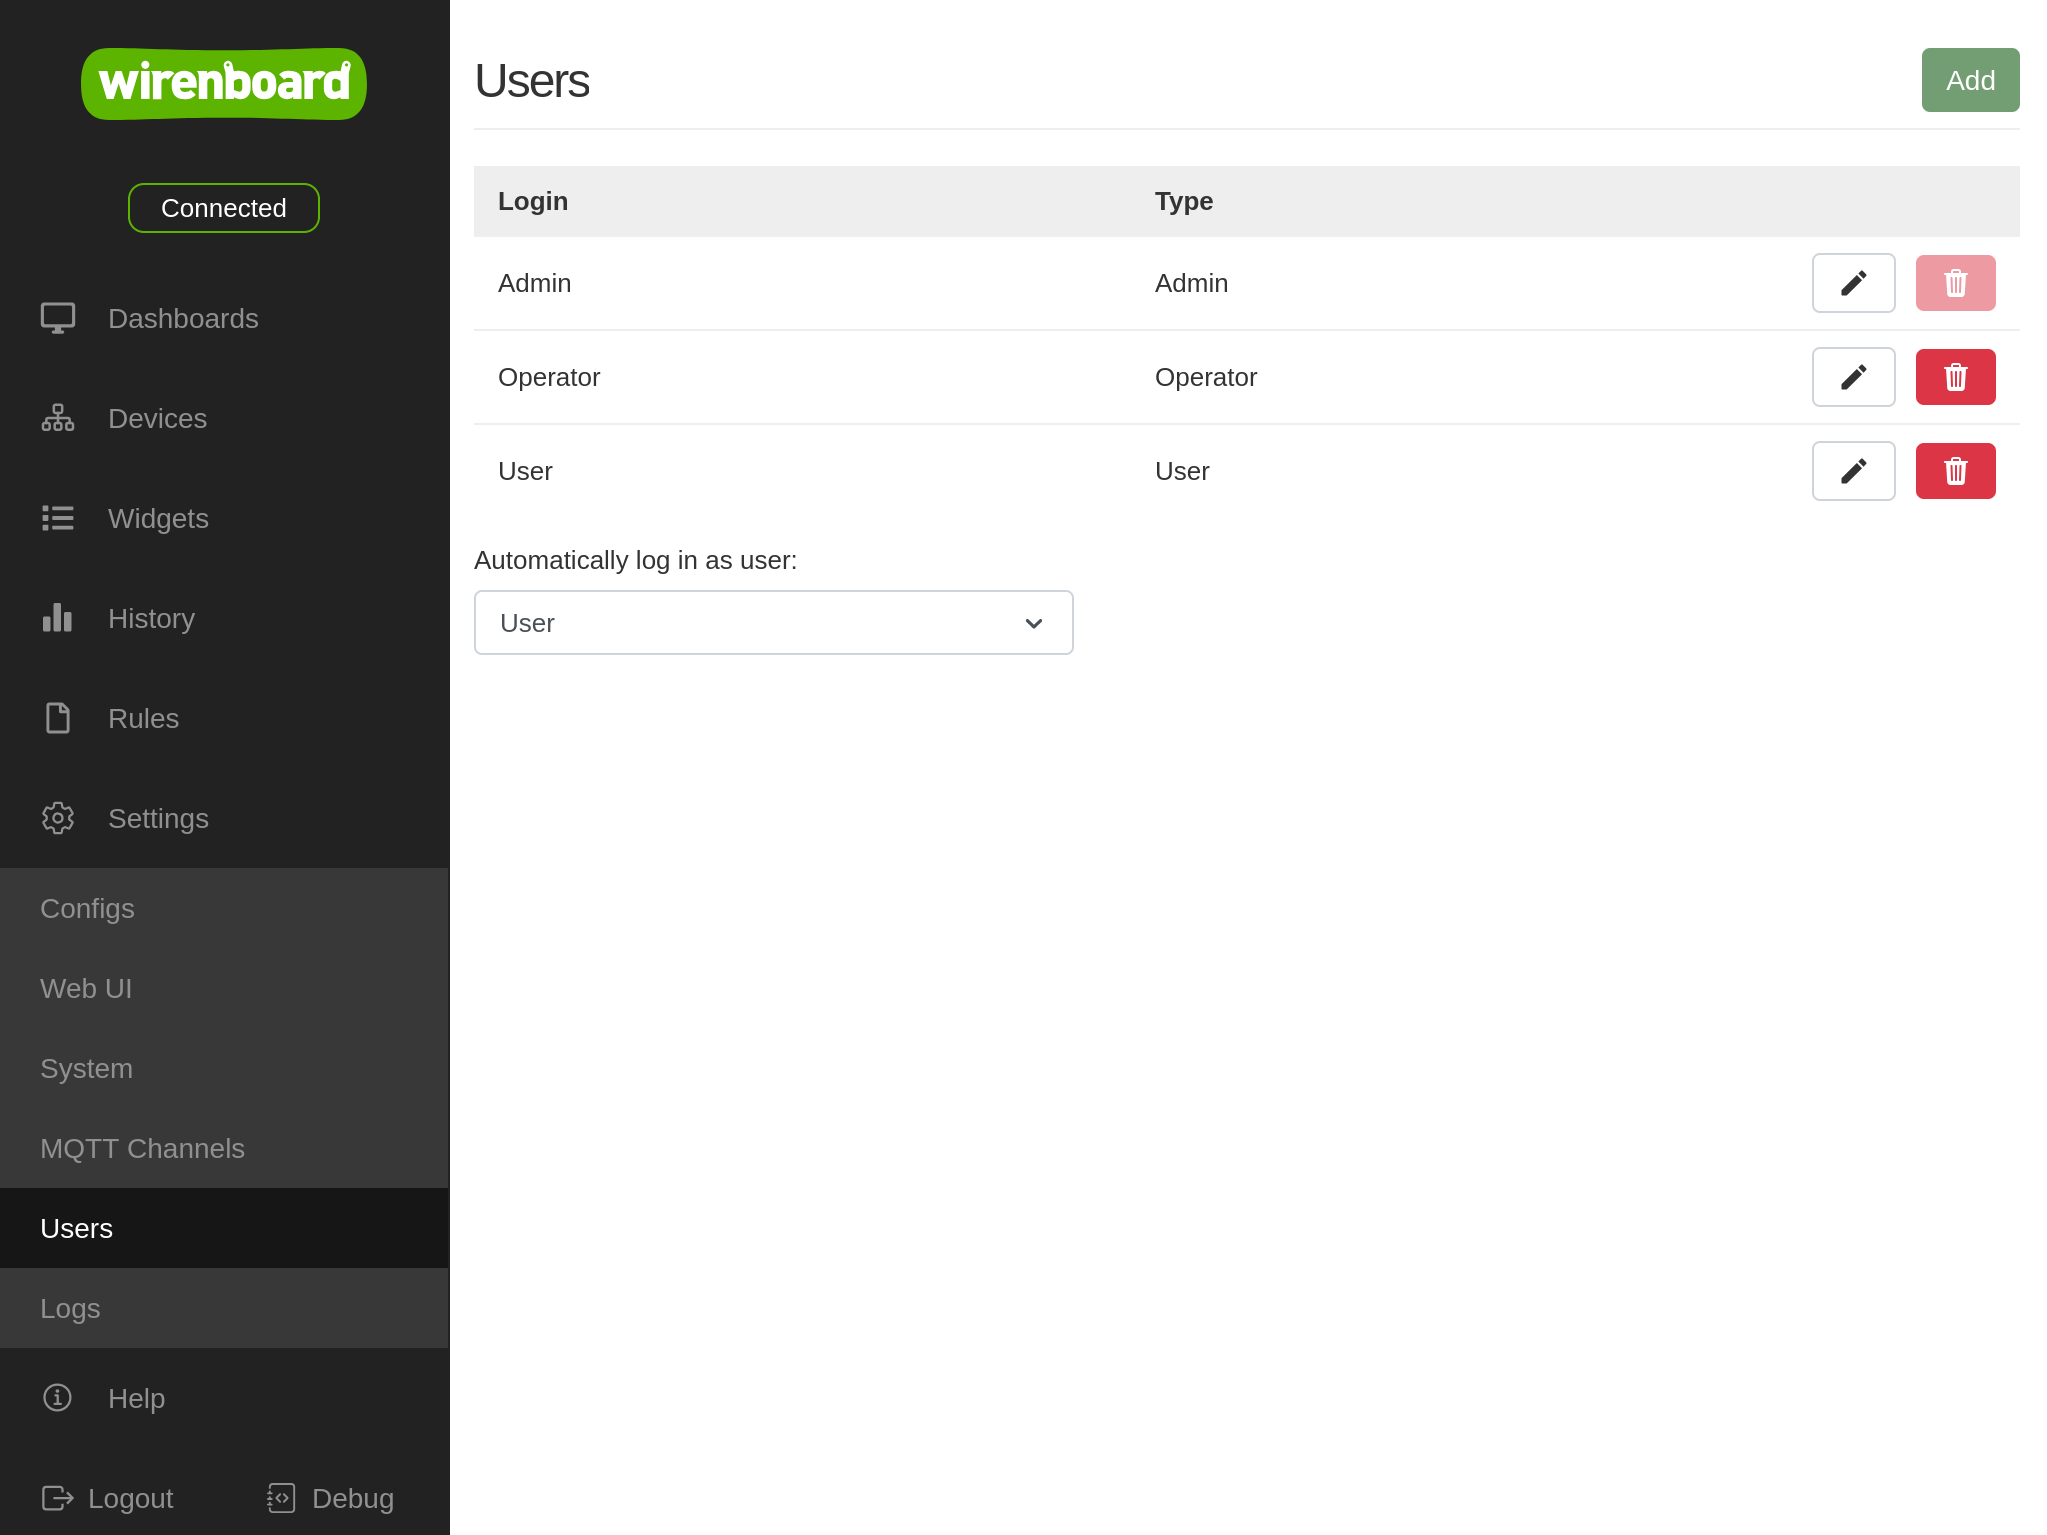
The access level depends on the user account. Users authenticate with a username and password. To change the controller settings, your account must have the following access level: Admin. User accounts are managed under Settings → Users. See User authentication and authorization.
In releases earlier than wb-2602 there are no user accounts; the access level is configured under Settings → Permissions.
Configuration
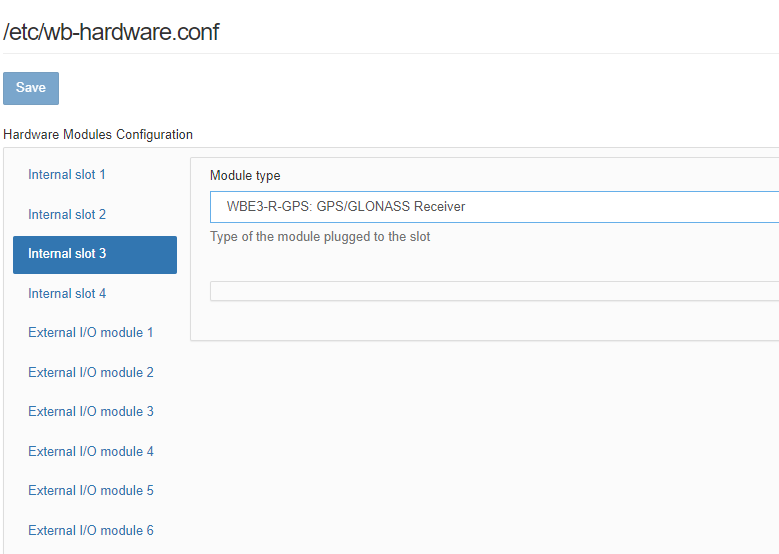
After physically connecting the module, add it to the controller configuration:
- In the web interface, open Settings → Configs → Expansion modules and ports and select the Internal slot in which the expansion module is installed.
- In the Module type list, select the name of the installed module.
- Click Save. The controller will enable the ports required by the module.
To remove a module from the configuration, select Not installed.
If the required module is missing from the list, update the system:
apt update
apt install wb-hwconf-manager
Firmware
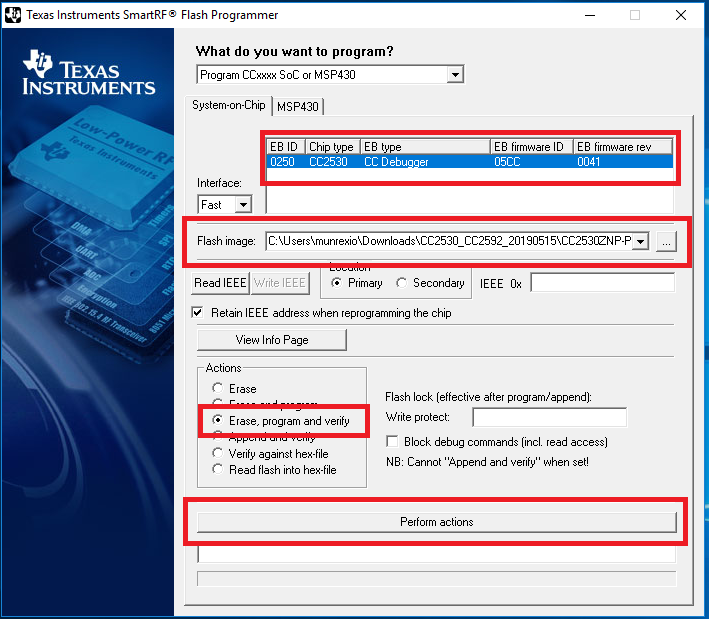
The module comes pre-flashed and ready for use, but firmware failures can occur. Problems are usually observed when the recommended number of direct connections is exceeded.
Flashing requires a CC Debugger with a cable, available from Aliexpress.com. Be careful: some adapters do not work reliably.
Flashing procedure:
- Install Development Tools USB Driver for Windows x86 and x64 (Rev. A).
- Download and install FLASH-PROGRAMMER (the original version, not v2) from the TI website.
- Connect CC Debugger to WBE2R-R-ZIGBEE and to the computer.
- Download the firmware file CC2530_CC2592_DEFAULT_20211115.zip.
- Start FLASH-PROGRAMMER; the device should appear in the table.
- Specify the firmware file path.
- In the area Actions select Erase, program and verify and click Perform actions.
If you use an adapter board and flashing fails, check whether its module power jumper is soldered. Illustrated instructions are available in this support portal post.
The original Windows and Linux flashing instructions are available on the zigbee2mqtt website.
Controller integration
Communication with the module uses a serial port whose name depends on the connector containing the module.
| Expansion module | Serial port |
|---|---|
| MOD1 | /dev/ttyMOD1 |
| MOD2 | /dev/ttyMOD2 |
| MOD3 | /dev/ttyMOD3 |
| MOD4 | /dev/ttyMOD4 |
Controller configuration instructions are available in Connecting Zigbee devices to a Wiren Board controller
Known issues
Known issues (errata) for WBE2R-R-ZIGBEE v.1
Hardware revisions
The batch number (Batch No.) is shown on a label on the side of the enclosure or on the printed circuit board.
| Revision | Batches | Production period | Changes from the previous revision |
|---|---|---|---|
| 1.2 | v1.2D/2, v1.2E, v1.2F | 01.2022 - 06.2022 |
|
| 1.2 | v1.2A - v1.2D | 06.2021 - 01.2022 |
|
| 1.1 | v1.1A - v1.1H | 08.2019 - 05.2021 |
|