 Documentation
WBE2-I-KNX
Internal KNX TP interface for Wiren Board controllers
Covered order codes (1)
WBE2-I-KNX— Internal KNX TP interface module
WBE2-I-KNX is an internal expansion module that adds a KNX TP bus interface to compatible Wiren Board controllers. It is intended for integrating KNX building-automation devices with controller services, MQTT and automation software.
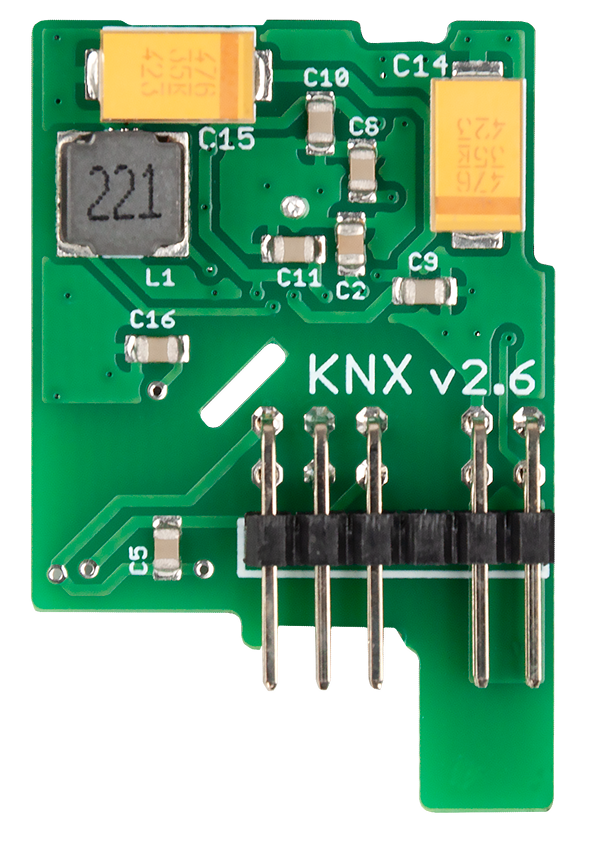
Module overview
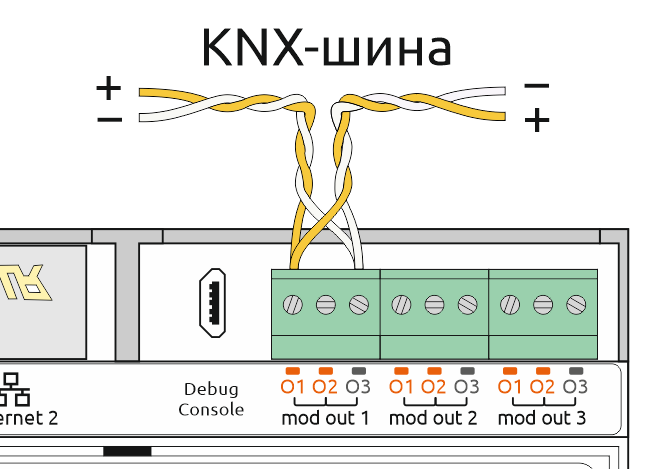
The module is installed inside a Wiren Board controller and provides a port for devices that communicate over KNX. The KNX bus must be powered for the module to operate.
Terminal assignment
| Terminal | Function |
|---|---|
| O1 (formerly Red) | KNX (+) |
| O2 | Not used |
| O3 (formerly Gray) | KNX (−) |
Warranty and service life
| Warranty | 2 years |
|---|---|
| Service life | 8 years |
Installation
Modules ordered together with a controller are normally factory-installed and only need to be enabled in the controller web interface. Install separately purchased modules as follows:
- Shut down the controller and disconnect all power sources.
- Open the controller enclosure.
- Insert the module in a compatible internal slot. Observe polarity: the locating projection on the module must enter the matching cut-out on the controller PCB.
- Reassemble the enclosure, connect the KNX bus and power the controller.
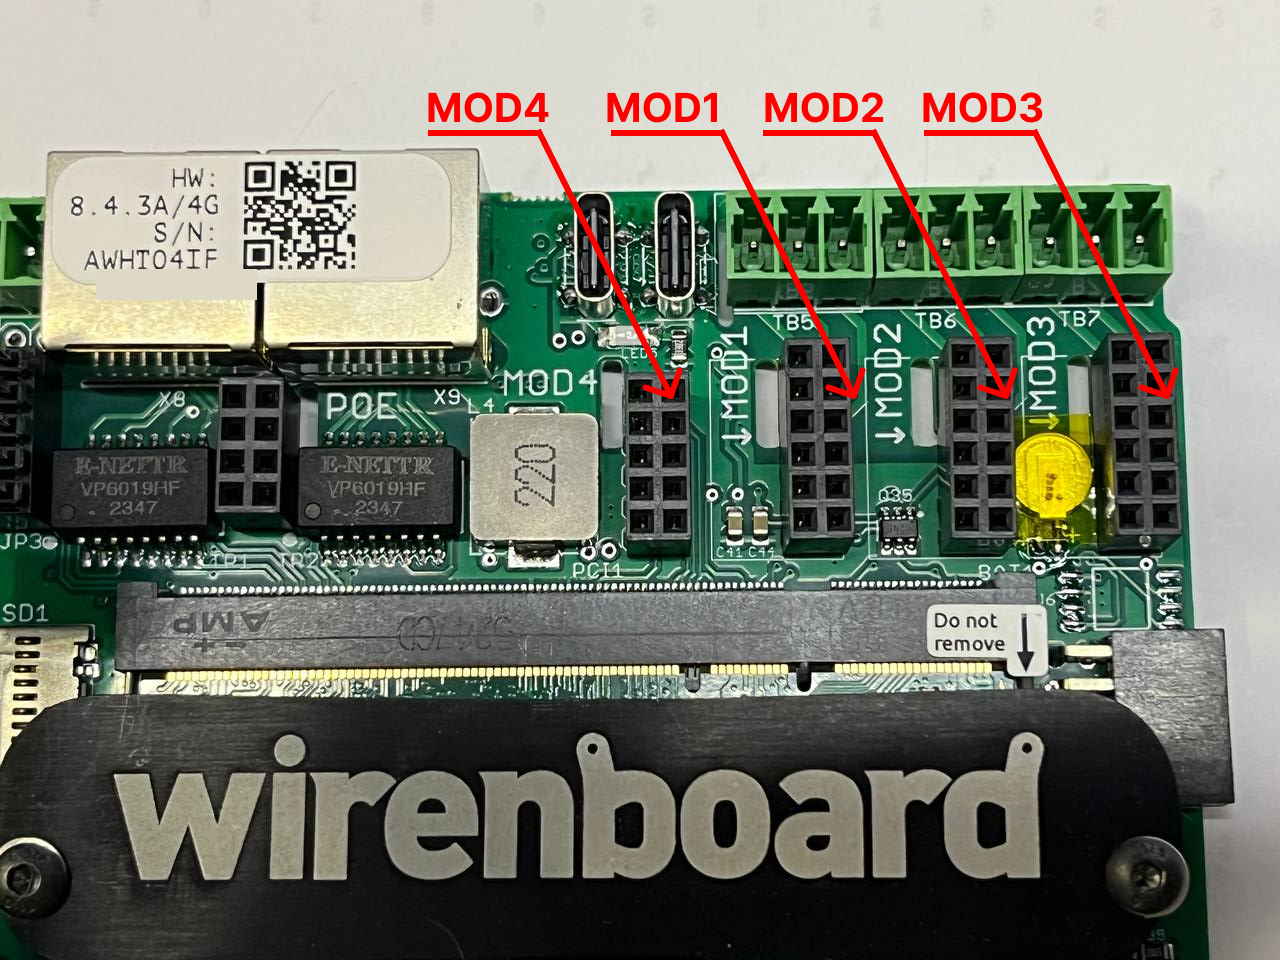
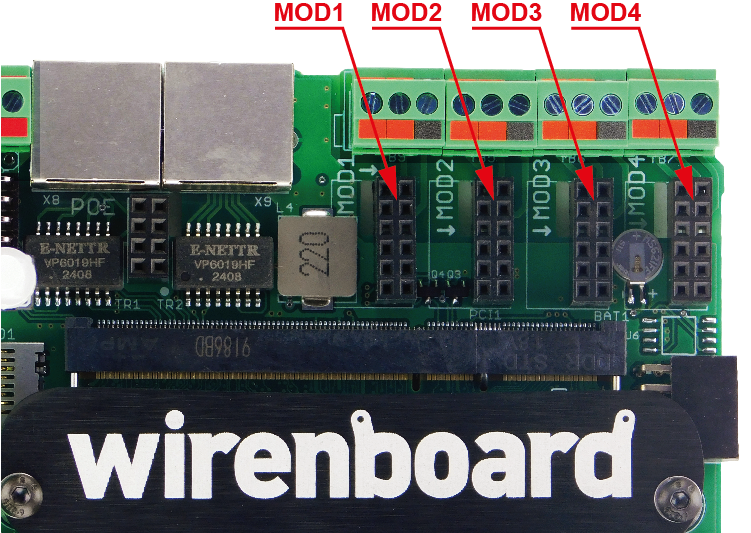
Controller compatibility
| Controller | Compatible slots | Incompatible slots |
|---|---|---|
| Wiren Board 6.3–6.6 | MOD1, MOD2 | MOD3 |
| Wiren Board 6.7 / 7 | MOD1, MOD2, MOD3 | MOD4 |
| Wiren Board 8.4 | MOD1, MOD2, MOD4 | MOD3 |
| Wiren Board 8.5 | MOD1, MOD2, MOD3, MOD4 | None |
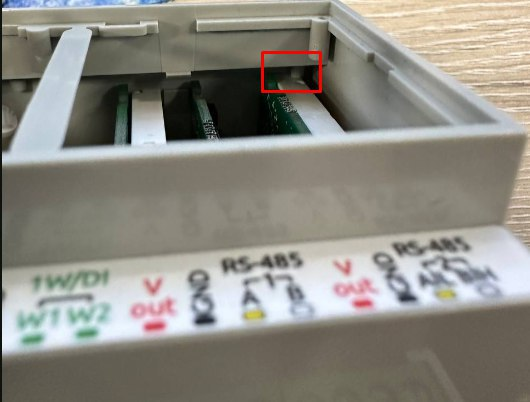
When installing the module in MOD3 on Wiren Board 6.7–8.4, or in MOD4 on Wiren Board 8.5, remove the interfering plastic projection from the enclosure with side cutters or a file. Remove only the marked projection and keep debris away from the electronics.
Controller configuration
Admin access
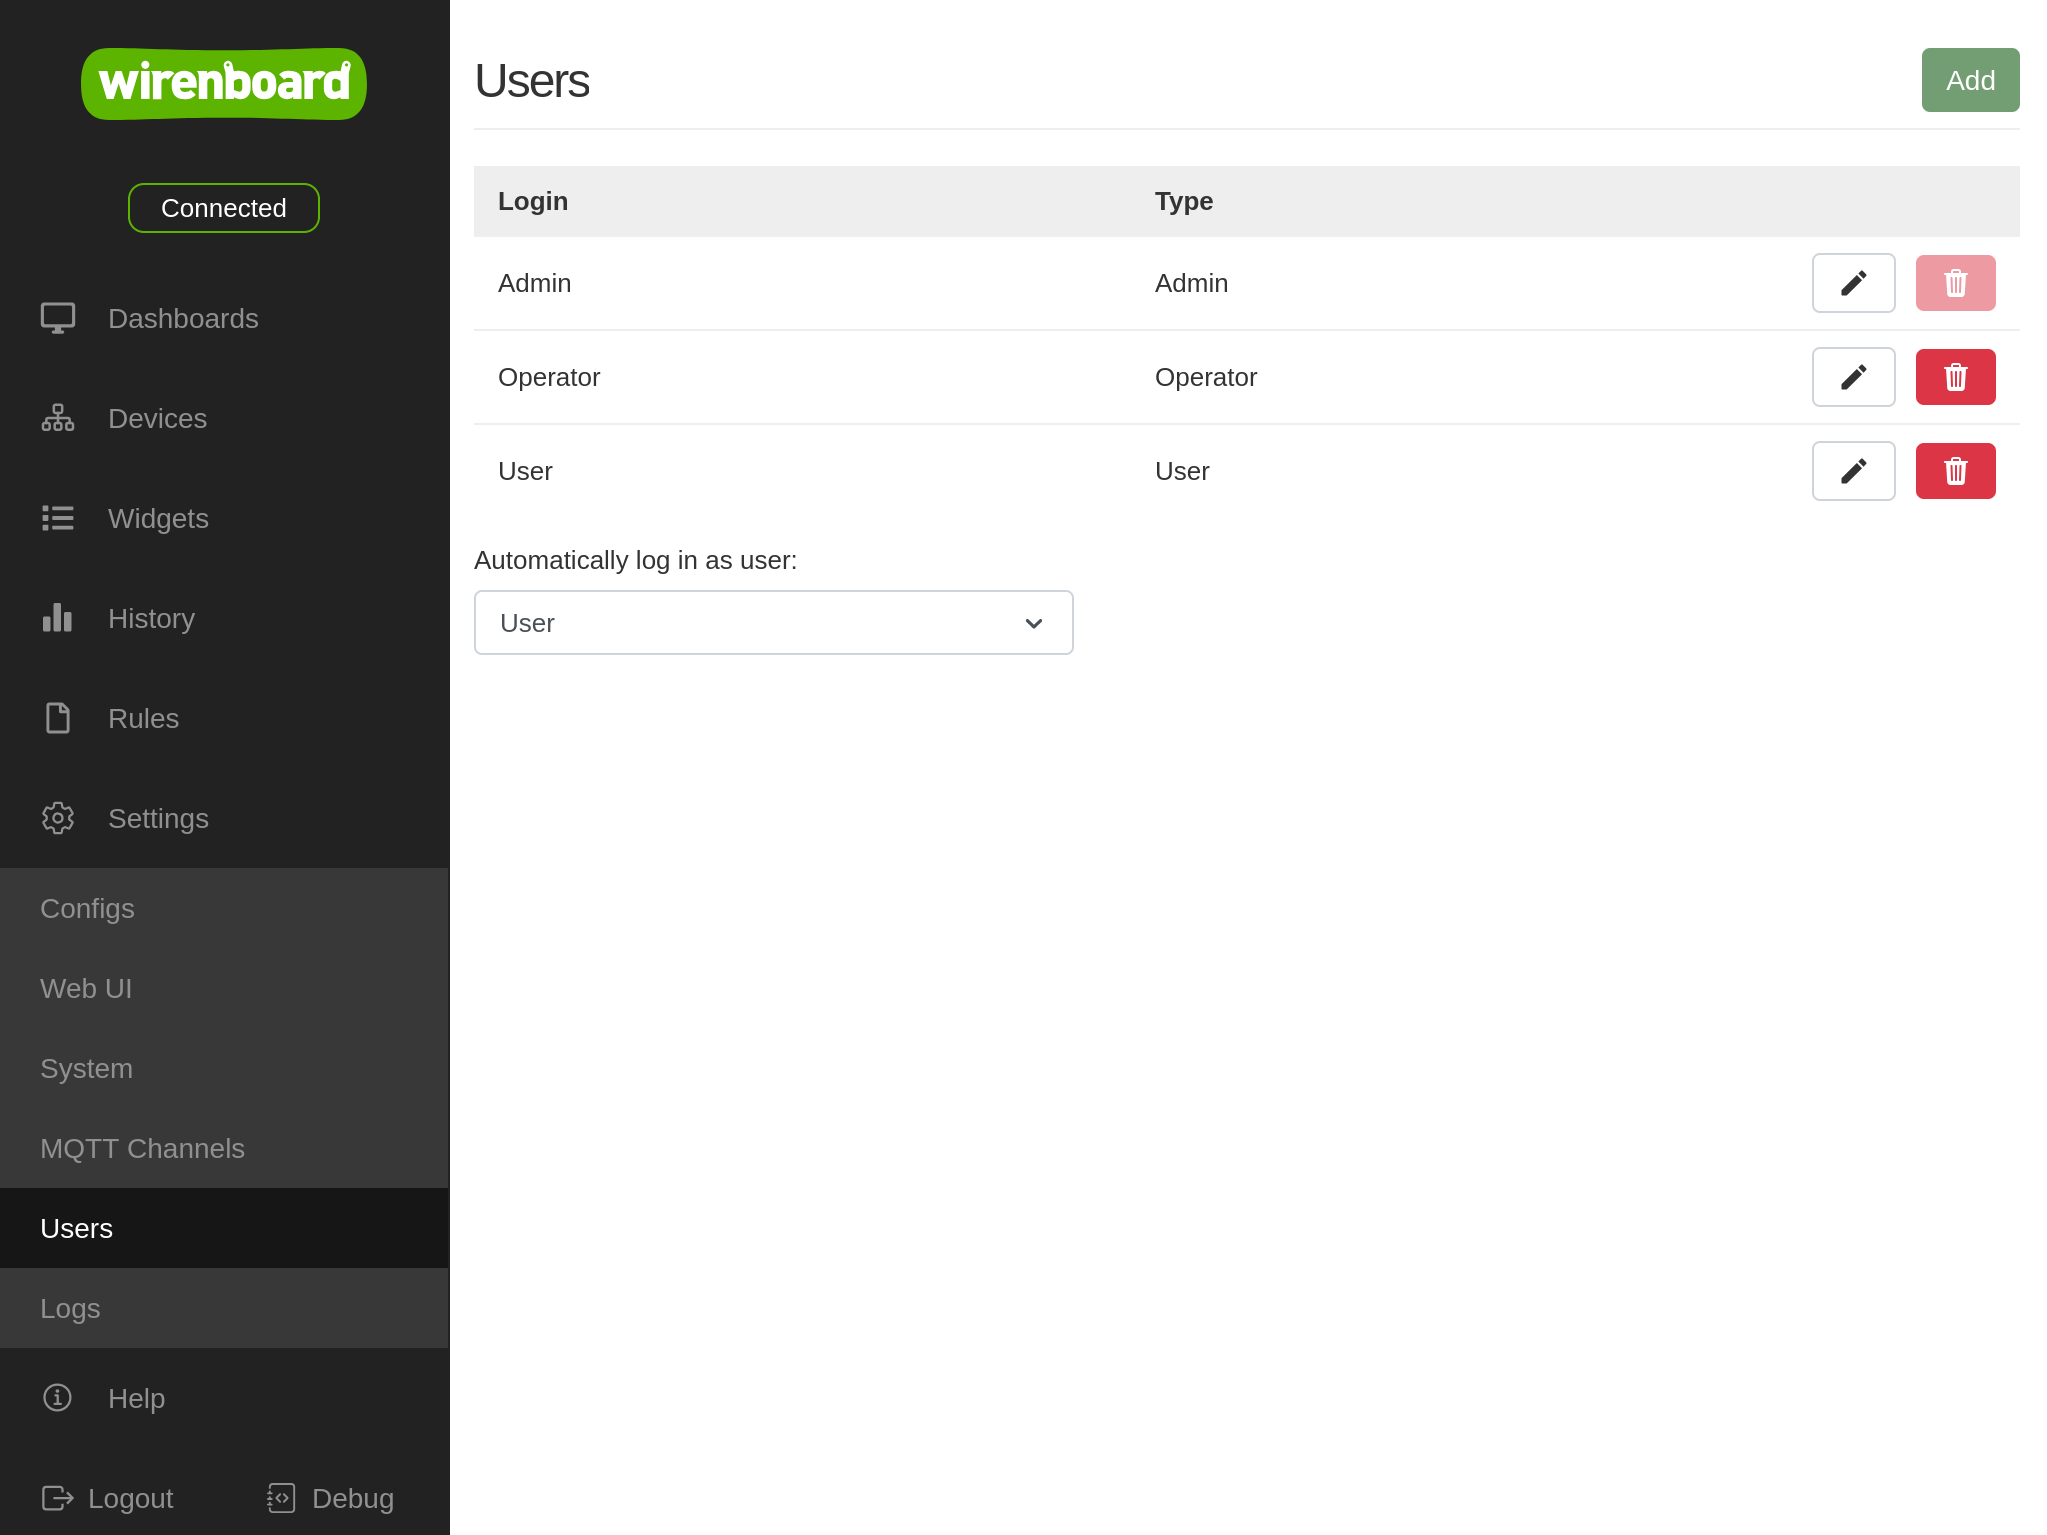
Configuration permissions are assigned to user accounts authenticated by login and password. To change controller settings, sign in with an account that has the Admin access level. Manage accounts under Settings → Users. On controller releases earlier than wb-2602, set the access level under Settings → Access level.
Enable the module
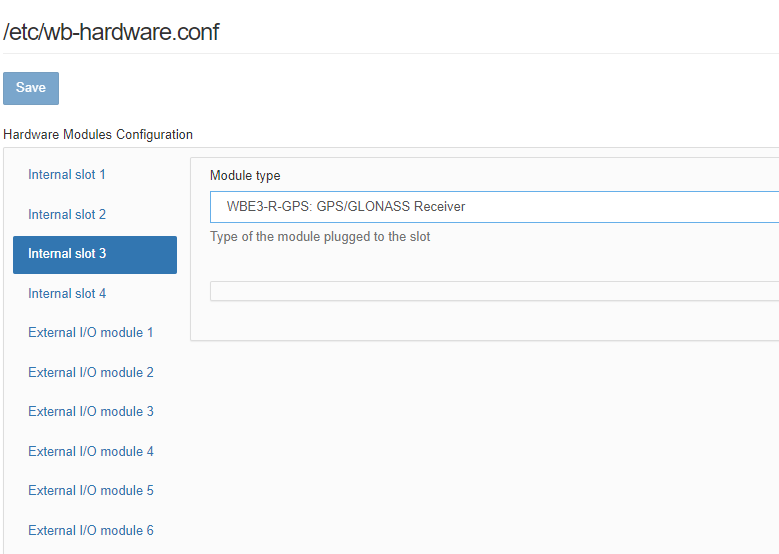
- Open Settings → Configs → Expansion modules and ports in the controller web interface.
- Select the internal slot containing WBE2-I-KNX.
- Choose the installed module type from the Module type list.
- Select the KNX-device option required by the configuration and click Save. The controller enables the ports needed by the module.
To remove the module from the software configuration, select Not installed for the slot and save the change.
Device nodes
The configuration creates symbolic links in /dev: ttyKNX1 for Internal slot 1 and ttyKNX2 for Internal slot 2. When the configuration contains only one KNX device, the additional ttyKNX link is created regardless of which of the two slots contains the module.
Operation
Preinstalled software
The recommended integration service is wb-mqtt-knx. It translates KNX telegrams to MQTT topics and MQTT commands back to KNX telegrams. Communication with the physical KNX bus is handled through the knxd router.
Use KnxTool for diagnostics, monitoring telegrams and checking communication. Confirm that the KNX power supply, polarity, bus topology and termination comply with the KNX installation design before diagnosing software.
Alternative software
iRidium Server can also be installed on a Wiren Board controller. It can communicate with the KNX bus directly through the serial module or through knxd. Use software versions compatible with the controller architecture and current Debian release.
Typical data path
- A KNX device transmits a telegram on the powered KNX TP bus.
- WBE2-I-KNX transfers it to the controller serial interface.
knxdprovides bus routing and tunnelling services.wb-mqtt-knxpublishes the telegram to MQTT or converts an MQTT command into a KNX telegram.
Troubleshooting
- No device node: verify the physical slot, module type and saved expansion-module configuration.
- No KNX traffic: verify KNX-bus power and O1/O3 polarity, then inspect
knxdandwb-mqtt-knxservice status. - Intermittent communication: check the module batch and revision against the history below. Early hardware has documented communication issues.
- ETS cannot discover the interface: verify that KNX tunnelling and discovery are enabled in
knxd, and that the workstation network permits multicast discovery.
Hardware revisions
The batch number is printed on the label on the side of the enclosure or directly on the module PCB.
| Revision | Batches | Production period | Change |
|---|---|---|---|
| 2.6 | v2.6A, v2.6B, v2.6C | February 2025–present | Digital-isolator galvanic isolation replaces optocouplers. |
| 2.5 | v2.5B/1, v2.5C, v2.5D, v2.5E | July 2024–February 2025 | Resolved a possible module-to-controller communication problem (ERRKNX220002). |
| 2.5 | v2.5B | January–July 2024 | NCN5121 transceiver. |
| 2.5 | v2.5A | October 2023 | Larger PCB cut-out for Wiren Board 7.4 compatibility. |
| 2.4 | v2.4E, v2.4F | May–October 2023 | NCN5120 transceiver. |
| 2.4 | v2.4A–v2.4D | January 2022–May 2023 | PCB geometry changed for Wiren Board 7 compatibility. |
| 2.3 | v2.3A–v2.3E | April 2020–January 2022 | NCN5121 transceiver; ERRKNX220001 corrected. |
| 2.2 | v2.2A | September 2019–April 2020 | PCB geometry changed and the mounting projection enlarged. |
| 2.1 | Late 2017–August 2019 | Late 2017–August 2019 | First production version. |