 Documentation
WB-MGE v.3 custom firmware and GPIO
Description
The module ships with factory firmware implementing gateway functions and supporting updates through the web interface.
This page describes running custom firmware on WB-MGE v.3 hardware. The user manual is available here: WB-MGE v.3 Modbus Ethernet Gateway.
Warranty claims are accepted for modules running factory firmware. If experiments with custom firmware reveal a hardware problem, restore the factory firmware, reproduce the problem with it and contact technical support.
Flashing firmware
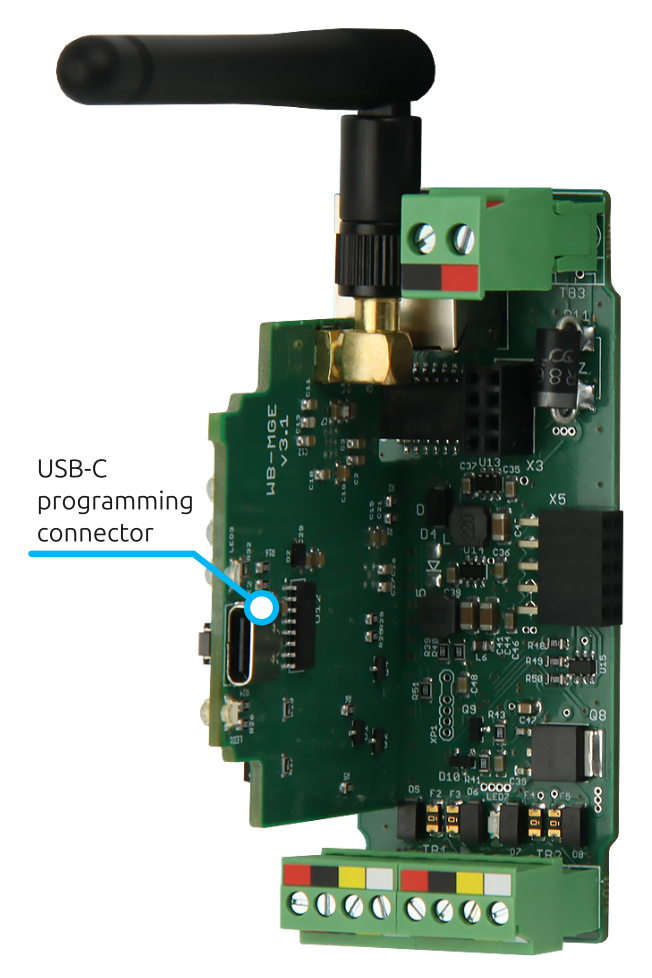
For flashing, use the utility esptool or an equivalent. A CH343-based USB-UART converter is built into the device.
Check communication by requesting the chip identifier, for example:
$ esptool.py -p /dev/ttyACM0 -b 115200 chip_id
esptool.py v4.8.1
Serial port /dev/ttyACM0
Connecting......
Detecting chip type... Unsupported detection protocol, switching and trying again...
Connecting.....
Detecting chip type... ESP32
Chip is ESP32-U4WDH (revision v3.1)
Features: WiFi, BT, Dual Core, 240MHz, Embedded Flash, VRef calibration in efuse, Coding Scheme None
Crystal is 40MHz
MAC: 2c:bc:bb:31:8b:00
Uploading stub...
Running stub...
Stub running...
Warning: ESP32 has no Chip ID. Reading MAC instead.
MAC: 2c:bc:bb:31:8b:00
Hard resetting via RTS pin...
DIY firmware examples
To help you get started, we provide sample configurations for the popular ESPHome platform. They demonstrate hardware access only and are unrelated to the original WB-MGE v.3 firmware.
Link: https://github.com/wirenboard/wb-mge-v3-diy-firmware-demo
GPIO and interfaces
The following tables show interface-module connections and port-expander output assignments.
Important! An internal STM32-based MIO section is connected to RS485-2. It uses Modbus RTU and occupies the Modbus address printed on the device label. It can be disabled using the corresponding GPIO.
| ESP32 | GPIO18 | GPIO23 | GPIO0 | GPIO5 | GPIO19 | GPIO22 | GPIO21 | GPIO25 | GPIO26 | GPIO27 |
|---|---|---|---|---|---|---|---|---|---|---|
| RTL8201FI | MDIO | MDC | CLK | RST | TXD0 | TXD1 | TXEN | RXD0 | RXD1 | CRS_DV |
| TCA9535 | SDA | SCL | PD00 | PD01 | PD02 | PD03 | PD04 | PD05 | PD06 | PD07 | PD10 |
|---|---|---|---|---|---|---|---|---|---|---|---|
| ESP32 | GPIO32 | GPIO33 | |||||||||
| RS485-1 | termination ON | failsafe bias ON | |||||||||
| RS485-2 | termination ON | failsafe bias ON | |||||||||
| MIO | OFF | ||||||||||
| VOut and VOut LED | ON | ||||||||||
| LED Wi-Fi | OFF | ||||||||||
| LED Eth | OFF | ||||||||||
| Status | ON |
In the table above, ON means a logic-high output enables the corresponding circuit. The Status LED also turns on when its port is in the high-impedance (HiZ) state. TCA9535 uses the standard bus address 0x20.
| ESP32 | GPIO10 | GPIO9 | GPIO4 | GPIO14 | GPIO12 | GPIO15 |
|---|---|---|---|---|---|---|
| RS485-1 | TX | RX | RTS | |||
| RS485-2 | TX | RX | RTS |
For the ESP32, RX is an input and TX is an output.
| ESP32 | GPIO34 |
|---|---|
| Config (B1) | + |
Pressing a button pulls the corresponding ESP32 port to logic low.
Restoring factory firmware
You can restore the factory firmware when needed. The device warranty remains valid.
Erase the experimental contents of flash memory:
esptool.py --chip esp32 --port /dev/ttyACM0 erase_flash
Download the firmware files:
- factory_mge.bin — partitions flash memory and starts the web interface used to upload the main firmware.
- mge_main.bin — the main firmware implementing gateway functions.
Flash the Factory firmware, replacing factory_mge.bin with the downloaded filename:
esptool.py --chip esp32 -p /dev/ttyACM0 -b 460800 --before=default_reset --after=hard_reset write_flash --flash_mode dio --flash_freq 40m --flash_size 4MB 0x0 factory_mge.bin
The main firmware mge_main.bin can be flashed in two ways:
- Through the web interface in Factory mode; see Updating firmware and resetting settings for details.
- Through the USB interface:
- Write the file to the OTA_0 partition, replacing
mge_main.binwith the downloaded filename:esptool.py --chip esp32 -p /dev/ttyACM0 -b 460800 --before=default_reset --after=hard_reset write_flash --flash_mode dio --flash_freq 40m --flash_size 4MB 0x90000 mge_main.bin
- Enable booting from the OTA_0 partition:
otatool.py --port /dev/ttyACM0 --baud 460800 switch_ota_partition --slot 0
- Write the file to the OTA_0 partition, replacing